Mastering Organization: Can Rack Organizer
A can rack organizer, often seen as a simple storage solution, holds far more versatility than meets the eye. Beyond just tidying up your pantry, these organizers can be employed in various settings and for multiple purposes, revolutionizing the way you organize and access items. Let’s delve into the diverse applications of a can rack organizer that go beyond just stacking cans. We will also provide a step-by-step guide on how to make the most of your can rack organizer.
If you need help finding a can rack organizer for any of the versatile applications listed below, see our product review article here.
Exploring the Versatility: Various Applications of a Can Rack Organizer
Kitchen Pantry: The Classic Use
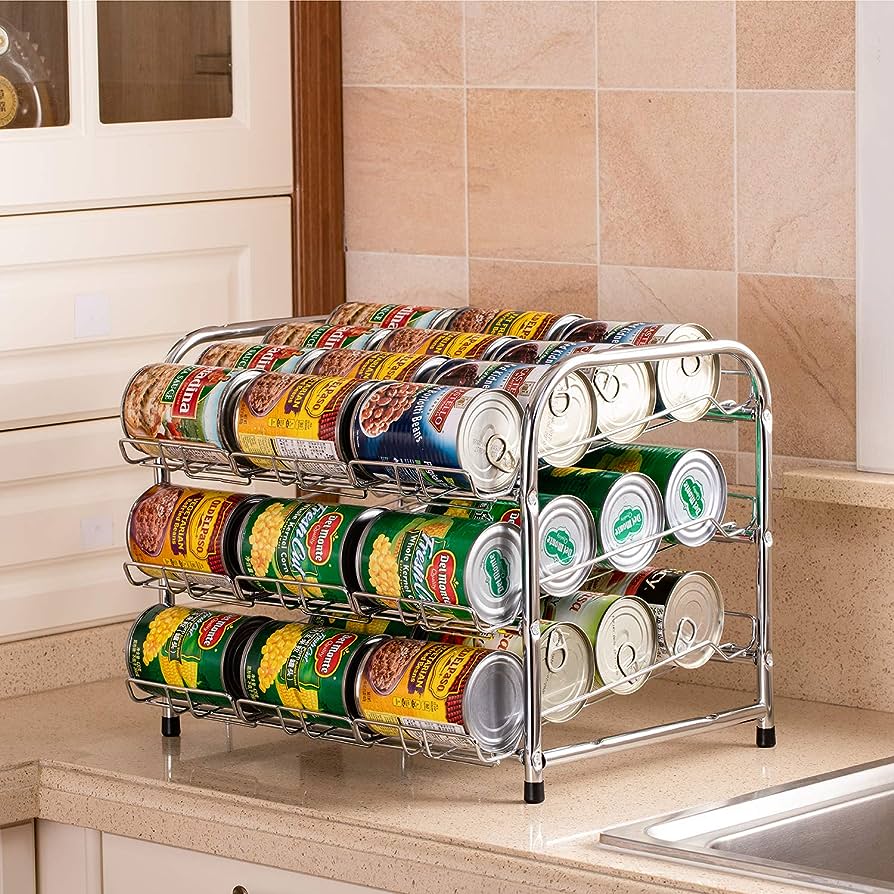
The most common application of a can rack organizer is, of course, in the kitchen pantry. It provides a systematic way to store canned goods, ensuring easy access, proper rotation, and reduced clutter. This setup facilitates meal preparation by allowing you to instantly spot the required ingredients. Moreover, its space-saving design optimizes your pantry’s capacity, making it a staple for busy kitchens where efficiency is paramount.
Bathroom Essentials Organizer
Who says can rack organizers are limited to the kitchen? In the bathroom, they can prove invaluable for storing toiletries like shampoo bottles, lotions, and even rolled-up towels. This application offers a neat way to organize items that tend to clutter bathroom shelves and counters. The tiered arrangement ensures items are visible and accessible, saving you time during your morning routine.
Craft and Hobby Supplies Storage
For craft enthusiasts, can rack organizers provide an efficient way to sort and store small art supplies such as paint tubes, brushes, markers, and even beads. The clear visibility helps you quickly locate the color or tool you need without sifting through disorganized drawers. This creative repurposing keeps your crafting area tidy, inspiring your artistic endeavors.
Garage or Workshop Organizer
Tame the chaos in your garage or workshop by using a can rack organizer to store tools, hardware, and DIY materials. From spray paint cans to screws and nails, these organizers offer a convenient solution to keep everything accessible. The sturdy construction ensures your equipment is secure and readily available for your next project.
Home Office Helper
In your home office, can rack organizers can efficiently hold stationery, notebooks, and other office supplies. Whether it’s pens, highlighters, or sticky notes, having a designated space for these items fosters a more organized workspace. You’ll spend less time searching for supplies and more time focusing on your tasks.
Kids’ Room Organizer
Children’s toys, art supplies, and even small clothing items can find a home in a can rack organizer within their room. Use it to sort building blocks, miniature cars, or dolls. The neat categorization fosters a sense of order for kids, making cleanup time less of a hassle.
Garden Shed Storage
Gardeners can also benefit from the adaptability of a can rack organizer. Use it to store small pots, gardening gloves, tools, and even seed packets. This prevents clutter in your garden shed and ensures your gardening essentials are easy to locate.
In conclusion, the applications of a can rack organizer extend far beyond its traditional use in the kitchen pantry. From bathroom organization to craft supplies storage and beyond, these organizers offer innovative solutions to common organizational challenges. By thinking creatively and applying these organizers to various aspects of your life, you can streamline your spaces, boost efficiency, and enjoy a more organized lifestyle.
Step-by-Step Guide: Making the Most of Your Can Rack Organizer
A can rack organizer is a valuable tool for keeping your kitchen or other spaces well-organized and efficient. Here’s a step-by-step guide to help you maximize the benefits of your can rack organizer:
Step 1: Assess Your Needs
Before you start organizing, take a moment to assess your needs. Consider the types and sizes of canned goods you use most frequently. This will help you plan the arrangement and ensure the organizer suits your specific requirements.
Step 2: Choose the Right Spot
Select a suitable location for your can rack organizer. In the kitchen, this is typically a pantry shelf or cabinet. Make sure the area is easily accessible and not too high or low, considering your comfort and convenience.
Step 3: Group Similar Items
Sort your canned goods into groups based on type or usage. For instance, group all your soups together, beans in another section, and sauces in another. This grouping will make it easier to find what you need later on.
Step 4: Arrange by Priority
Place the cans you use most frequently within easy reach, ideally at eye level. Less frequently used items can go on higher or lower shelves. This arrangement ensures quick access to the essentials without needing to move other cans around.
Step 5: Optimize Rotation
As you place your canned goods on the organizer, follow the principle of “first in, first out” (FIFO). Put the older cans at the front so that you use them before the newer ones. This helps prevent items from expiring unused.
Step 6: Use Dividers or Organizers
If your can rack organizer has adjustable dividers or shelves, make use of them. Customize the spaces to accommodate different can sizes. This prevents cans from falling over and maximizes the storage capacity of your organizer.
Step 7: Utilize Every Nook
Don’t forget to use the top of your can rack organizer or the space above it. If your organizer is stackable, consider placing a second set on top to double your storage capacity. Just ensure that the height fits comfortably in your storage area.
Step 8: Label for Easy Identification
Consider using labels to identify the contents of each section. This not only makes finding items quicker but also helps others in your household maintain the organization.
Step 9: Regularly Check and Adjust
Periodically assess your can rack organizer’s contents. Remove any expired or dented cans and adjust the arrangement as needed. This prevents clutter and ensures you’re always using the freshest items.
Step 10: Keep It Tidy
Maintain the organization of your can rack organizer by doing a quick tidy-up every once in a while. This could involve straightening cans, wiping down the shelves, and ensuring everything remains in its designated place.
By following these steps, you’ll be able to maximize the efficiency and convenience of your can rack organizer. With a well-organized storage system, you’ll save time during meal preparation, reduce food wastage, and enjoy a clutter-free space.
Frequently Asked Questions
Where should a can rack organizer be placed in a kitchen?
Deciding where to place a can rack organizer in your kitchen depends on the layout of your kitchen, the available space, and your personal preferences. However, there are a few common and practical locations you might consider:
- Pantry Shelves: Placing a can rack organizer in your pantry is a popular choice. It keeps canned goods neatly organized and easily accessible. If you have deep shelves, consider placing the organizer near the front so you can access cans without reaching too far back.
- Cabinets: If your kitchen cabinets have shelves that are deep enough, you can use a can rack organizer to keep your canned goods in order. This is especially useful if your pantry space is limited or if you want to keep your frequently used items closer to your cooking area.
- Under the Sink: If you have cabinet space under the sink that isn’t being used for cleaning supplies or other items, you could install a can rack organizer here. This location might work well for smaller or infrequently used canned goods.
- Countertop: If you have limited cabinet or pantry space, and you frequently use canned goods, you might consider placing a smaller can rack organizer on your countertop. This provides easy access and keeps your most-used items within arm’s reach.
- Kitchen Island: If you have a kitchen island with shelves or storage space, you could place a can rack organizer here. It can be a convenient spot if you often prep meals on the island.
- Wall-Mounted Organizer: Some kitchens have empty wall space that could accommodate a wall-mounted can rack organizer. This can be a creative and space-saving solution, especially in smaller kitchens.
- Walk-In Pantry: If you’re fortunate enough to have a walk-in pantry, you have more flexibility in terms of where you place your can rack organizer. Depending on the layout of your pantry, you might choose a location that’s easily accessible and visible.
- Inside Cabinet Doors: Some can rack organizers are designed to be mounted on the inside of cabinet doors. This can be a smart way to use otherwise unused space and keep cans out of sight but still accessible.
Ultimately, the best location for your can rack organizer depends on your kitchen’s layout and your specific needs. Keep in mind the convenience of access, the amount of space available, and how often you use canned goods. Regardless of where you choose to place it, the goal is to make sure your can rack organizer enhances your kitchen’s organization and functionality.
What should I not use a can rack organizer for?
While can rack organizers are versatile tools for efficient storage, there are certain items and situations for which they might not be the best choice. Here are some things you should avoid using a can rack organizer for:
- Heavy Items: Can rack organizers are typically designed to hold cans and relatively lightweight items. Avoid placing heavy items like pots, pans, or large kitchen appliances on them, as they might not provide the necessary support and could lead to instability or damage.
- Unsealed or Unstable Items: Items that are not securely packaged, such as bags of flour, cereal, or loose vegetables, might not sit well on a can rack organizer. The design of the organizer is often optimized for canned goods, which have a stable and consistent shape.
- Bulky Items: Can rack organizers are designed with a specific size in mind—cans. Trying to store items that are significantly larger or bulkier, like large bottles or boxes, may lead to inefficiency and wasted space.
- Fragile Items: Delicate items that can break easily, such as glass jars, should be stored elsewhere. The angled or tiered design of can rack organizers might not provide the protection needed for fragile items.
- Perishable Items: While canned goods have a longer shelf life, some food items are perishable and need refrigeration. Can rack organizers are not suitable for storing items that require cold temperatures to stay fresh and safe to consume.
- Items with Expiration Dates: While can rack organizers can help with rotation, it’s not the best solution for items with short expiration dates like dairy or fresh produce. These items need to be kept in the appropriate storage areas.
- Items in Humid Environments: If your kitchen or storage area is prone to humidity, avoid using a can rack organizer for items that could be negatively affected by moisture. Cans might rust or labels might peel off, affecting both the appearance and the contents.
- Medications or Personal Care Products: Can rack organizers are not designed for storing medications, vitamins, or personal care products. It’s best to keep these items in their original containers and store them in a secure, dry, and appropriate place.
- Overloading: While can rack organizers can hold a good amount of weight, avoid overloading them to the point where they become unstable. Overloading could lead to the organizer tipping over or items getting stuck.
Remember that can rack organizers are designed with specific purposes in mind, and using them outside of those purposes might not yield the best results. It’s always a good idea to read the manufacturer’s guidelines and consider the structural integrity of the organizer and the safety of the items you’re planning to store.
Can a can rack organizer hold most sized cans?
Can rack organizers are designed to accommodate a range of can sizes, but the specific sizes they can hold may vary based on the design and dimensions of the organizer. Many can rack organizers are designed to fit standard-sized cans commonly found in grocery stores. These are typically 15-ounce cans for products like soups, vegetables, and fruits.
However, some organizers may have adjustable dividers or shelves that allow you to customize the spaces to fit various can sizes. This can increase the versatility of the organizer and enable you to store smaller or larger cans effectively.
It’s important to check the product specifications and dimensions provided by the manufacturer before purchasing a can rack organizer. This information will help you determine whether the organizer can accommodate the specific types of cans you typically use in your household. If you have a mix of can sizes, consider looking for an organizer with adjustable features to ensure it meets your storage needs.
What are common materials for a can rack organizer?
Can rack organizers come in a variety of materials, each with its own advantages in terms of durability, aesthetics, and functionality. Here are some common materials used for can rack organizers:
- Metal (Steel or Wire): Metal can rack organizers are among the most popular choices due to their sturdiness and durability. They can typically hold a significant amount of weight and are resistant to wear and tear. Steel or wire organizers often have a sleek and modern appearance, making them suitable for a range of kitchen styles.
- Plastic: Plastic can rack organizers are lightweight and often more affordable than metal options. They’re easy to clean and can work well for those with limited storage needs or for temporary organization solutions. However, plastic organizers might not be as durable as metal ones, especially for heavy use.
- Wood: Wooden can rack organizers provide a rustic and natural look to your storage space. They might not be as common as metal or plastic organizers, but they can add a unique aesthetic to your kitchen. Wood is generally less resistant to moisture and wear, so it might not be the best choice for areas prone to spills or heavy use.
- Acrylic or Clear Plastic: These organizers offer visibility, allowing you to see the contents easily. They can work well for pantries or cabinets where you want a clear view of what’s inside. However, acrylic or clear plastic might not be as robust as other materials and could be prone to scratches.
- Chrome or Stainless Steel: Some metal can rack organizers have a chrome or stainless steel finish, which adds a sleek and polished look to your kitchen. These materials are often resistant to rust and corrosion, making them suitable for environments with moisture.
- Wrought Iron: Wrought iron can rack organizers provide a vintage and decorative appearance. They’re heavier and can be more ornate in design, making them a choice for those who want to add an artistic touch to their storage solutions.
When choosing the material for your can rack organizer, consider factors such as your kitchen’s decor, the level of usage the organizer will undergo, and your personal preferences. Opt for a material that aligns with both the aesthetics and functionality you’re seeking in your organization solution.
editor's pick
news via inbox
Stay one step ahead with exclusive tips, guides, and offers delivered directly to your inbox.
Sign up for our newsletter and elevate your home improvement game today!