Mastering the Use of Exterior Primer: A Comprehensive Guide
When it comes to exterior painting projects, the role of primer goes beyond being a mere preparatory layer. Exterior primers are versatile products with a wide range of applications, each contributing to the success, longevity, and overall quality of the final paint job. Let’s delve into the various applications of exterior primer and understand why it’s a crucial step in any outdoor painting endeavor. We will also provide a step-by-step guide on how to use exterior primer effectively and efficiently for your exterior painting projects.
If you need help finding exterior primer for any of the versatile applications listed below, see our product review article here.
Exploring the Diverse Applications of Exterior Primer
Surface Preparation and Adhesion Enhancement
One of the primary roles of exterior primer is to prepare the surface for the application of paint. Exterior surfaces can be uneven, porous, or have varying textures, which can pose challenges for paint adhesion. Primer creates a uniform and slightly roughened surface that improves the bond between the paint and the substrate. This enhanced adhesion minimizes the risk of peeling, cracking, and flaking, especially in outdoor conditions where surfaces are subjected to temperature fluctuations, moisture, and UV rays.
Stain Blocking and Discoloration Prevention
Exterior primers, especially those with specialized formulations, offer effective stain-blocking properties. They create a barrier that prevents stains, tannins, watermarks, and other discolorations from bleeding through the paint. This is particularly beneficial when painting over surfaces with a history of stains or when using light-colored paints. By preventing these imperfections from showing through, the primer ensures a clean and uniform appearance for the final paint layer.
Moisture Resistance and Surface Protection
Exterior surfaces are exposed to the elements, including rain, snow, and humidity. Moisture can seep into porous materials like wood, leading to issues such as rot and mold growth. Exterior primer acts as a protective barrier, sealing the surface and preventing moisture penetration. This helps prolong the life of the substrate and the paint job itself. By minimizing moisture-related damage, primer contributes to the structural integrity of the surface.
Texture and Imperfection Hiding
If the surface has imperfections, such as minor cracks, dents, or small holes, primer can help hide these flaws. The slightly textured surface created by the primer helps even out minor irregularities, creating a smoother canvas for the final paint. This is particularly noticeable when using glossy paints, as imperfections can become more pronounced on reflective surfaces.
Uniform Color and Enhanced Paint Appearance
Exterior primer provides a consistent base color that allows the topcoat of paint to achieve its true and vibrant shade. Without primer, the underlying surface color might alter the final paint color, leading to uneven results. Primer ensures that the topcoat’s color remains accurate and true to your intended design, enhancing the overall aesthetic appeal of your project.
Durability and Longevity
Exterior primers are formulated to withstand the challenges posed by outdoor environments. They protect the underlying surface from UV radiation, temperature fluctuations, and other weather-related stressors. This added layer of protection contributes to the longevity of the paint job, reducing the frequency of repainting and saving you time and money in the long run.
In conclusion, the applications of exterior primer extend far beyond being a mere preliminary layer before paint. From enhancing adhesion and preventing stains to providing protection against moisture and weather, exterior primer plays a vital role in ensuring the success of any outdoor painting project. It’s a fundamental step that contributes to the beauty, durability, and overall quality of your painted surfaces, making it an indispensable tool in the toolkit of any painter or homeowner looking to transform their outdoor spaces.
Step-By-Step Guide on How to Use Exterior Primer Effectively
Applying exterior primer is a crucial step in achieving a professional and long-lasting paint job. Properly primed surfaces enhance paint adhesion, durability, and overall finish. Follow this step-by-step guide to ensure you apply exterior primer effectively:
Step 1: Gather Your Supplies
Collect all the necessary supplies, including exterior primer, appropriate brushes or rollers, painter’s tape, drop cloths, sandpaper (if needed), and protective gear such as gloves and safety goggles.
Step 2: Prepare the Surface
Clean the surface thoroughly to remove dirt, dust, grease, and any loose paint. Use a mild detergent or a dedicated surface cleaner. For surfaces with peeling paint, scrape off the loose paint and sand the area to create a smooth surface.
Step 3: Repair and Fill
Inspect the surface for cracks, holes, or other imperfections. Fill these gaps using an appropriate filler or patching compound. Allow it to dry, and then sand it smooth.
Step 4: Sand the Surface (If Necessary)
If the surface is glossy or uneven, lightly sand it to create a slightly roughened texture. This helps the primer adhere better to the surface.
Step 5: Protect Surrounding Areas
Use painter’s tape to mask off any areas you don’t want to prime. Cover nearby plants, furniture, and other surfaces with drop cloths to protect them from overspray or drips.
Step 6: Stir and Test the Primer
Stir the primer thoroughly to ensure even consistency. Before applying it to the entire surface, do a small test patch in an inconspicuous area to ensure proper adhesion and compatibility with the surface.
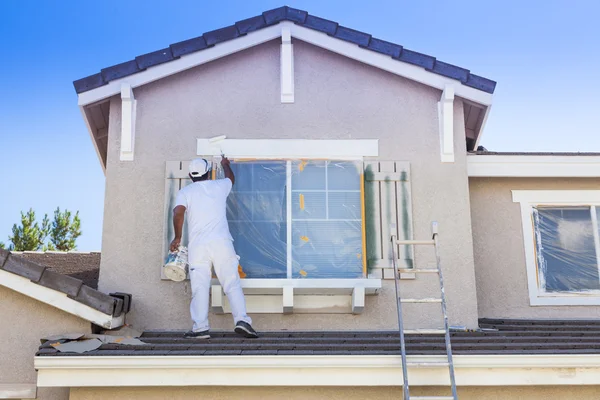
Step 7: Apply the Primer
Using a high-quality brush or roller suitable for the type of primer you’re using, start applying the primer. Work in small sections, applying an even coat in smooth, overlapping strokes. Avoid applying the primer too thickly, as it can lead to drips and longer drying times.
Step 8: Work Methodically
Work from the top of the surface downwards to catch any drips. Pay extra attention to corners, edges, and intricate details. Keep a wet edge as you work to prevent lap marks.
Step 9: Allow Drying Time
Check the manufacturer’s instructions for the recommended drying time. Generally, water-based primers dry faster than oil-based ones. Make sure the primer is completely dry before proceeding to the next step.
Step 10: Inspect and Touch Up
Once the primer is dry, inspect the surface for any missed spots, thin areas, or imperfections. Touch up these areas as needed.
Step 11: Dispose of Materials Properly
Dispose of used brushes, rollers, and any waste materials according to local regulations. If you used oil-based primer, clean your tools using an appropriate solvent.
Step 12: Apply Paint
After the primer is fully dry and you’re satisfied with the surface, you can proceed to apply your chosen exterior paint. The primer provides a solid foundation for the paint to adhere to, resulting in a smoother and more durable finish.
By following these steps and taking your time to properly apply exterior primer, you’ll set the stage for a successful painting project that will withstand the challenges of the outdoors and provide you with a beautiful and long-lasting finish.
Frequently Asked Questions
How many coats of exterior primer should I use?
The number of coats of exterior primer you should use depends on several factors, including the condition of the surface, the type of primer you’re using, and the desired finish. In most cases, one or two coats of primer are sufficient for exterior surfaces. Here’s a general guideline to help you determine how many coats of exterior primer you should apply:
Surface Condition:
- Bare Wood: If you’re working with bare wood, one coat of primer is usually enough. However, if the wood is very porous, you might consider applying a second coat to ensure proper coverage and adhesion.
- Previously Painted Surfaces: If the surface has been previously painted and is in good condition, one coat of primer is often adequate. However, if the existing paint is very dark or glossy, or if the surface has stains or discolorations, a second coat may be needed for better coverage and to prevent any underlying imperfections from showing through.
Type of Primer:
- Coverage and Formulation: Some primers offer better coverage than others due to their formulation and consistency. Check the manufacturer’s recommendations on the primer’s label for guidance on how many coats are recommended for optimal results.
Desired Finish:
- Smooth Finish: If you’re aiming for a very smooth and flawless finish, applying two coats of primer can help fill in minor imperfections and create a more uniform surface for the topcoat.
Surface Preparation:
- Proper surface preparation, including cleaning, repairing, and sanding, can affect the coverage and adhesion of the primer. Well-prepped surfaces often require fewer coats.
Professional Advice:
- If you’re uncertain about how many coats of primer to apply, you can consult with paint professionals or the manufacturer’s customer service for specific recommendations based on your project’s details.
Tips:
- When applying multiple coats of primer, make sure to allow each coat to dry thoroughly before applying the next. Follow the manufacturer’s instructions for the recommended drying time.
- Before proceeding to the topcoat of paint, inspect the primed surface for any uneven areas, missed spots, or imperfections. Touch up as needed before applying paint.
In summary, while one coat of primer is typically sufficient for most exterior surfaces, there are situations where a second coat might be beneficial for better coverage and adhesion. Consider the surface condition, type of primer, and desired finish when deciding how many coats to apply. Always follow the manufacturer’s recommendations for the specific primer you’re using to achieve the best results.
How long do you have to wait to paint after using exterior primer?
The waiting time before painting after using exterior primer can vary depending on several factors, including the type of primer, the weather conditions, and the manufacturer’s recommendations. However, as a general guideline, here are some typical drying times for different types of exterior primers:
Water-Based (Latex) Exterior Primer:
- Drying Time: Water-based primers generally dry faster than oil-based ones. In optimal conditions, you might need to wait around 1 to 4 hours before painting over a water-based primer.
Oil-Based Exterior Primer:
- Drying Time: Oil-based primers usually take longer to dry compared to water-based ones. Waiting for 24 to 48 hours is common before applying paint over an oil-based primer.
Manufacturer’s Recommendations:
- It’s essential to follow the specific instructions provided by the primer manufacturer. The label or product documentation should indicate the recommended drying time before applying the topcoat of paint.
Humidity and Temperature:
- Humidity and temperature can significantly impact drying times. Higher humidity and cooler temperatures can extend drying times, while warm, dry conditions can expedite the process.
Surface Conditions:
- The condition of the surface you’re priming can also influence drying times. Porous surfaces might absorb primer more slowly, leading to longer drying times.
Multiple Coats:
- If you’re applying multiple coats of primer, each coat will need to dry before you can proceed to the next coat. Follow the manufacturer’s recommendations for drying time between coats.
Topcoat Compatibility:
- Some primers and paints are designed to work together as a system. In such cases, following the recommended drying time between primer and paint applications is crucial for optimal adhesion and performance.
Remember that these are general guidelines, and the specific circumstances of your project can affect drying times. Always refer to the primer’s label or the manufacturer’s instructions for accurate information on drying times. If you’re unsure about when to proceed with painting, it’s better to err on the side of caution and wait a bit longer to ensure the primer is fully cured and ready for the topcoat.
Do you need to sand exterior primer before painting?
Sanding exterior primer before painting is not always necessary, but it can be beneficial in certain situations. Whether or not you need to sand the primer depends on factors such as the condition of the surface, the type of primer used, and the desired finish.
Here are some scenarios where sanding exterior primer might be recommended:
Rough or Uneven Surfaces: If the exterior surface is rough, uneven, or has imperfections, lightly sanding the primer can help create a smoother and more uniform surface for the topcoat. Sanding can help level out minor irregularities and provide a better foundation for a flawless paint finish.
Glossy Surfaces: If the surface was previously coated with a glossy paint or finish, sanding the primer can help create a surface with improved adhesion. Glossy surfaces can be less receptive to paint adhesion, so sanding provides some “tooth” for the primer and paint to grip onto.
High-Build Primers: High-build primers, which are thicker and designed to fill in minor imperfections, might require sanding to achieve a smooth finish. Sanding can help blend the high-build primer with the surrounding areas and create a consistent surface.
Between Coats: If you’re applying multiple coats of primer, lightly sanding between coats can help promote better adhesion and create a smoother overall finish. This step is particularly relevant when using high-build primers or if the previous coat of primer has a rough texture.
Adhesion Improvement: Sanding the primer with fine-grit sandpaper can help enhance the adhesion of the topcoat. The slightly roughened surface provides more surface area for the paint to bond with.
Tips for Sanding Exterior Primer:
- Use fine-grit sandpaper (around 220-grit) for light sanding. Coarser sandpaper can remove too much primer and affect the primer’s effectiveness.
- Sand gently and evenly, focusing on creating a consistent surface rather than removing the entire primer layer.
- After sanding, clean the surface to remove any dust and debris before proceeding with painting.
- Keep in mind that some primers are specifically designed to eliminate the need for sanding. Check the manufacturer’s instructions for guidance.
Ultimately, sanding exterior primer before painting is an optional step that depends on the specific conditions of your project. If you’re unsure whether sanding is necessary or beneficial, you can consult the primer’s label or the manufacturer’s guidelines for recommendations on surface preparation.
How long can you leave exterior primer on before painting?
The maximum amount of time you can leave exterior primer on before painting can vary depending on factors such as the type of primer, the weather conditions, and the manufacturer’s recommendations. In most cases, it’s best to apply the topcoat of paint within a certain time frame to ensure the primer’s adhesion and effectiveness.
Here are some general guidelines:
Water-Based (Latex) Exterior Primer:
- For water-based primers, it’s advisable to apply the topcoat within 30 days after priming. After this period, the primer might start to lose its optimal adhesion properties, potentially affecting the quality of the paint job.
Oil-Based Exterior Primer:
- Oil-based primers generally have a longer window for painting after priming. You can typically apply the topcoat within 60 to 90 days after priming. However, keep in mind that oil-based primers tend to take longer to fully cure.
Manufacturer’s Recommendations:
- Always refer to the manufacturer’s instructions on the primer’s label or product documentation for the recommended maximum time frame for painting after priming. Manufacturers design their products with specific guidelines in mind to ensure optimal performance.
Weather Conditions:
- Weather conditions can influence the primer’s durability and adhesion over time. Harsh weather, extreme temperatures, and exposure to moisture can all affect the longevity of the primer’s effectiveness.
Surface Conditions:
- The condition of the primed surface also plays a role. If the surface is exposed to direct sunlight, moisture, or other adverse conditions, it’s best to paint over the primer sooner rather than later.
Inspection and Surface Preparation:
- Before applying the topcoat, inspect the primed surface for any signs of deterioration, dust, or debris. If the primer appears compromised, it’s recommended to clean and re-prime the area before painting.
Bonding Considerations:
- For the best results, try to paint within the recommended time frame to ensure that the primer and paint bond properly. This helps to prevent issues such as poor adhesion, flaking, and peeling.
It’s important to note that these time frames are general guidelines, and the specific conditions of your project can influence how long you can leave exterior primer on before painting. If you’re uncertain or the primer has been on for an extended period, it’s a good idea to consult the manufacturer’s recommendations or seek advice from paint professionals to ensure the best results for your specific situation.
Can you use too much exterior primer?
Yes, it’s possible to use too much exterior primer, and doing so can lead to several issues that affect the quality of your paint job and the longevity of the finish. Applying an excessive amount of primer can result in problems such as poor adhesion, longer drying times, and an uneven finish.
Here are some potential issues that can arise from using too much exterior primer:
Poor Adhesion: Using an excessive amount of primer can create a thick layer that might not adhere properly to the surface. This can lead to poor bonding between the primer and the topcoat of paint, causing issues like peeling, cracking, and flaking over time.
Longer Drying Times: Thicker layers of primer take longer to dry. Applying too much primer can extend the overall painting process and delay the application of the topcoat. This might also make the surface more susceptible to dust, debris, and other contaminants while it’s drying.
Uneven Finish: A thick layer of primer can result in an uneven surface texture, which can affect the appearance of the final paint job. The topcoat may not lay down smoothly over areas with excess primer, leading to a less polished finish.
Waste of Material: Using more primer than necessary not only wastes the product but also increases the cost of your project. It’s important to apply primer in a controlled and measured manner to ensure efficient use of materials.
Increased Drying and Curing Time: Excessive primer can take longer to dry and cure, which means you’ll need to wait longer before proceeding with painting. This can be inconvenient, especially if you’re working within a specific time frame.
Cracking and Bubbling: Thick layers of primer can lead to issues such as cracking and bubbling as the primer dries and cures. These imperfections can be visible through the topcoat of paint and detract from the overall appearance.
Difficulty in Applying Topcoat: A very thick layer of primer can create an uneven surface that makes it challenging to apply the topcoat of paint evenly. This can result in an inconsistent finish that requires additional touch-ups.
Tips to Avoid Using Too Much Primer:
- Follow the manufacturer’s guidelines for the recommended coverage rate and application thickness for the specific primer you’re using.
- Apply primer in thin, even coats to achieve the desired coverage. Avoid “loading up” the brush or roller with excess primer.
- If a second coat of primer is recommended, make sure the first coat is completely dry before applying the second coat.
- If you’re unsure about the appropriate amount of primer to apply, consult the manufacturer’s instructions or seek advice from paint professionals.
In summary, applying too much exterior primer can lead to a range of issues that compromise the quality and durability of your paint job. It’s important to follow the manufacturer’s recommendations and apply primer in a controlled and measured manner to ensure the best results.
How long should I wait between coats of exterior primer?
The waiting time between coats of exterior primer can vary depending on factors such as the type of primer, weather conditions, and the manufacturer’s recommendations. Generally, water-based (latex) primers tend to dry faster than oil-based primers. Here are some general guidelines for the waiting time between coats of exterior primer:
Water-Based (Latex) Exterior Primer:
- Water-based primers typically dry faster than oil-based ones. In optimal conditions, you might wait around 1 to 4 hours before applying a second coat of water-based primer. However, it’s essential to refer to the manufacturer’s instructions on the primer’s label for specific recommendations.
Oil-Based Exterior Primer:
- Oil-based primers take longer to dry compared to water-based ones. You might need to wait around 24 to 48 hours before applying a second coat of oil-based primer. Again, always follow the manufacturer’s recommendations for the best results.
Weather and Humidity:
- Humidity and temperature can influence drying times. High humidity and cooler temperatures can extend drying times, while warm, dry conditions can expedite the process.
Surface Conditions:
- The condition of the surface being primed can affect drying times. Porous surfaces might absorb primer more slowly, leading to longer drying times.
Manufacturer’s Recommendations:
- Always consult the primer’s label or product documentation for the manufacturer’s specific instructions on the recommended waiting time between coats.
Sanding (If Necessary):
- If you’re sanding between coats of primer, make sure the surface is completely dry before proceeding. Sanding damp primer can lead to poor adhesion and a less smooth finish.
Multiple Coats:
- If you’re applying multiple coats of primer, make sure each coat is dry to the touch before applying the next. Follow the manufacturer’s guidelines for drying time between coats.
It’s important to note that these time frames are general guidelines, and the specific conditions of your project can influence drying times. Always refer to the manufacturer’s recommendations for accurate information on waiting times between coats of exterior primer. If you’re uncertain about when to proceed with the next coat, it’s better to wait a bit longer to ensure that the primer is fully dry and ready for the next application.
When should you not use exterior primer?
While exterior primers offer numerous benefits for preparing surfaces before painting, there are situations where using exterior primer may not be necessary or advisable. Here are some scenarios when you might consider not using exterior primer:
Repainting Over a Sound Surface: If the existing paint is in good condition, well-adhered, and not showing signs of peeling, flaking, or other issues, you might not need to use exterior primer. In such cases, thorough cleaning, light sanding, and applying the topcoat directly over the existing paint could be sufficient.
Stain-Blocking Not Needed: If you’re working on a surface that doesn’t have significant stains, discolorations, or bleed-through issues, using a stain-blocking primer may not be necessary. A regular topcoat might provide the coverage you need.
Surface with Limited Porosity: Some surfaces, like metal or certain types of siding, have less porous textures that allow paint to adhere well without the use of primer. However, proper surface preparation, including cleaning and sanding, might still be needed.
Over Highly Prepped Surfaces: If the surface has already been thoroughly prepped with proper cleaning, sanding, and repairs, the use of primer might be optional, especially if the topcoat has good adhesion properties.
Specialty Paints: Some specialty paints are formulated to be self-priming or to adhere well to a variety of surfaces without the need for a separate primer. Always check the paint manufacturer’s recommendations and instructions.
Manufacturer’s Recommendations: If the manufacturer of the paint you’re using specifically advises against using primer with their product, it’s best to follow their guidance.
Freshly Manufactured Surfaces: Some new building materials or surfaces might have a very smooth finish that can make it challenging for primer to adhere. In such cases, using a bonding agent or a primer specifically designed for such surfaces might be more effective.
Environmental Concerns: In certain situations where you’re looking to minimize the use of VOCs (volatile organic compounds) or reduce the environmental impact, you might choose to skip using primer if it’s not essential for your project.
In general, while there are instances where exterior primer might not be necessary, it’s important to evaluate the condition of the surface, the type of paint you’re using, and your project goals. Primer can provide a range of benefits, including improved adhesion, better coverage, and enhanced durability. If you’re unsure whether to use primer, you can consult with paint professionals or follow the manufacturer’s recommendations for the specific products you’re using.
editor's pick
news via inbox
Stay one step ahead with exclusive tips, guides, and offers delivered directly to your inbox.
Sign up for our newsletter and elevate your home improvement game today!