Mastering the Use of a Watercolor Brush: A Comprehensive Guide
A watercolor brush, with its unique characteristics and versatile nature, is a tool that extends beyond traditional watercolor painting. While it’s primarily associated with delivering fluid pigments onto paper, its potential reaches far beyond that. From traditional artworks to modern mixed-media creations, the applications of a watercolor brush are diverse and expansive. Let’s delve into the various ways this humble tool can be used across different artistic realms. We will also provide a step-by-step guide on how to use a watercolor brush effectively for all your detailed painting needs.
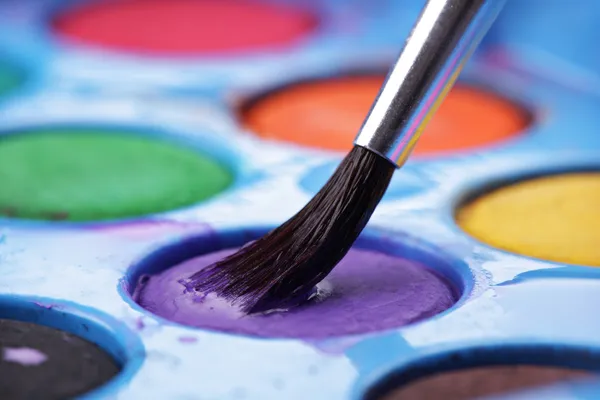
If you need help finding a watercolor brush for any of the versatile applications listed below, check out our product review here.
Exploring the Versatility: Applications of a Watercolor Brush
Traditional Watercolor Painting
The most obvious and classic use of a watercolor brush is, of course, in traditional watercolor painting. The brush’s ability to hold water and deliver controlled, fluid strokes is indispensable for techniques like wet-on-wet, wet-on-dry, glazing, and layering. Artists can create luminous washes, delicate gradients, and intricate details, giving life to landscapes, portraits, still lifes, and more.
Illustration and Line Work
Watercolor brushes excel at producing fine lines and detailed illustrations. Artists can use pointed round brushes for intricate line work and hatching, giving illustrations a rich and expressive quality. The brush’s ability to hold pigment in its bristles facilitates the creation of consistent and precise lines.
Calligraphy and Lettering
The versatility of a watercolor brush makes it a fantastic tool for calligraphy and lettering. With a pointed round brush, artists can achieve variations in line thickness, creating elegant and dynamic letterforms. The brush’s responsiveness to pressure allows for the creation of both thin hairlines and bold strokes, resulting in visually captivating typography.
Mixed Media and Collage
In mixed-media artworks and collage, watercolor brushes can be used to apply not only watercolor paints but also a wide range of other materials, such as acrylics, inks, and even adhesives. The brush’s ability to handle different mediums makes it an essential tool for artists who love combining textures and visual elements.
Ink Washes and Pen-and-Wash Art
Watercolor brushes are perfect for creating ink washes and enhancing pen-and-ink artworks. Artists can use them to apply watercolor washes over ink drawings, adding depth, dimension, and a watercolor-like effect to their illustrations.
Background Washes and Gradients
Watercolor brushes are also effective for creating background washes and gradients in various art forms. Whether you’re painting a large canvas, creating a digital artwork, or working on a design project, the brush’s ability to blend colors seamlessly can add depth and atmosphere to your work.
Staining and Bleeding Effects
Experimenting with staining and bleeding effects is another intriguing application of a watercolor brush. By loading the brush with water and pigment, artists can create controlled bleeds and blooms on wet paper, resulting in ethereal and unpredictable patterns.
Decorative Arts and Crafts
In decorative arts and crafts, watercolor brushes can be used to apply paint to various surfaces beyond traditional paper, such as fabric, wood, ceramics, and more. Artists can use watercolor techniques to transform everyday objects into unique and personalized works of art.
In conclusion, the applications of a watercolor brush extend far beyond traditional watercolor painting. Its ability to hold water, create fine lines, blend colors, and work with various mediums makes it an indispensable tool across a wide range of artistic practices. From traditional artworks to contemporary mixed-media pieces, the versatility of the watercolor brush allows artists to explore and experiment, pushing the boundaries of their creativity in exciting and unexpected ways.
Step-By-Step Guide on How to Use a Watercolor Brush Effectively
Mastering the art of using a watercolor brush effectively is crucial for achieving the desired results in your paintings. Whether you’re a beginner or looking to refine your techniques, this step-by-step guide will help you make the most of this versatile tool.
Step 1: Choose the Right Brush
Select a watercolor brush that suits your painting style and technique. Consider the brush’s shape, size, and bristle material. Round brushes with pointed tips are great for details and fine lines, while flat brushes are useful for broad strokes and washes.
Step 2: Wet the Brush
Dip the brush in clean water and gently swish it around to saturate the bristles. Be sure not to overload the brush with water; it should be damp but not dripping.
Step 3: Load the Brush with Pigment
Dip the damp brush into your chosen watercolor pigment. Gently touch the brush to the pigment and allow the bristles to absorb the color. Make sure not to press too hard, as excessive pressure can damage the bristles.
Step 4: Test the Brush on Scrap Paper
Before applying the paint to your artwork, test the brush on a scrap piece of paper. This will help you gauge the intensity of the color and the consistency of the paint on the brush.
Step 5: Control Water-to-Paint Ratio
Adjust the water-to-paint ratio to control the transparency and intensity of the color. For a more vibrant color, use less water and more pigment. For lighter washes and softer colors, increase the water content on the brush.
Step 6: Apply Paint with Controlled Strokes
Hold the brush at the end of the handle for better control. Use light, controlled strokes to apply the paint to the paper. Experiment with pressure to vary the thickness of the line or stroke.
Step 7: Create Gradations and Washes
To create gradations and washes, start with a damp brush and apply a stroke of color to the paper. Rinse the brush and use it to spread the color while the paper is still wet. This will create smooth transitions from light to dark.
Step 8: Blending Colors
For blending, layer wet colors while they’re still wet on the paper. Use the wet-in-wet technique by adding one color next to another on the paper and allowing them to mix naturally.
Step 9: Details and Fine Lines
To paint details and fine lines, use a brush with a pointed tip. Load the brush with pigment and use a light touch to create delicate lines or small details.
Step 10: Cleaning the Brush
After each use, clean the brush by rinsing it thoroughly with water. Gently reshape the bristles with your fingers and allow the brush to air dry or store it with the bristles facing up to maintain their shape.
Step 11: Practice and Experiment
Like any skill, mastering watercolor brush techniques takes practice. Experiment with different brush sizes, shapes, and techniques to discover what works best for your style. Don’t be afraid to make mistakes; they’re essential for growth.
Step 12: Explore Different Mediums
Watercolor brushes aren’t limited to watercolors alone. Experiment with using them with other mediums like inks, acrylics, and gouache to create unique effects and textures.
Remember, using a watercolor brush effectively is a journey of continuous learning and exploration. Embrace the process, be patient with yourself, and enjoy the creative journey as you develop your skills and create stunning works of art.
Frequently Asked Questions
How do you break in a new watercolor brush?
Breaking in a new watercolor brush involves preparing the bristles for optimal performance and ensuring they hold water and paint properly. Here’s how you can effectively break in a new watercolor brush:
- Initial Rinse: Start by giving your new brush a gentle rinse in lukewarm water. This helps remove any manufacturing residues or sizing that might be present on the bristles.
- Shape Check: Examine the bristles to ensure they’re well-shaped and not frayed or splayed. If you notice any issues, gently reshape the bristles using your fingers to create a point or desired shape.
- Test on Scrap Paper: Before using the brush on your artwork, test it on a scrap piece of watercolor paper. Dip the brush in water and make a few strokes to check how the bristles respond and how the paint flows from the brush.
- Conditioning the Bristles: To condition the bristles and prepare them for better water retention, gently wash the brush with mild soap or a brush cleaner designed for watercolor brushes. Rinse thoroughly to remove any soap residue.
- First Use: When using the brush for the first time on your artwork, avoid pressing too hard or overloading the brush with paint. Start with a light touch and gradually apply more pressure as you become familiar with the brush’s behavior.
- Gradual Pigment Load: In the initial uses, gradually increase the amount of pigment you load onto the brush. This allows the bristles to absorb and hold the color effectively without causing the brush to become overloaded.
- Light Pressure: While painting, use light pressure when applying the brush to the paper. This helps maintain the brush’s shape and prevents excessive wear on the bristles.
- Experiment with Techniques: Use your new brush to experiment with various watercolor techniques, such as washes, blending, wet-on-wet, and dry brush. This will help you get a feel for how the brush performs in different situations.
- Regular Cleaning: After each painting session, clean your new brush thoroughly by rinsing it with lukewarm water. Gently reshape the bristles and allow the brush to air dry, either hanging upside down or lying flat on a clean surface.
- Avoid Harsh Treatments: Avoid using the brush with excessive force, scrubbing the bristles, or leaving it submerged in water for extended periods. These actions can damage the brush and affect its performance.
- Patience is Key: Breaking in a new watercolor brush takes time and patience. With each use, the bristles will gradually become more responsive and hold water and pigment more effectively.
Remember that breaking in a new watercolor brush is about establishing a comfortable relationship between you and the tool. As you become accustomed to its behavior, you’ll be better equipped to create the effects you desire in your watercolor artworks.
What is the best way to hold a watercolor brush?
Holding a watercolor brush correctly is essential for achieving control, precision, and a comfortable painting experience. The way you hold the brush influences the type of strokes you can make, the amount of pressure you apply, and the overall quality of your watercolor artwork. Here’s the best way to hold a watercolor brush:
- Use a Loose Grip: Hold the brush with a loose and relaxed grip. Avoid gripping the handle tightly, as this can restrict your movement and cause fatigue in your hand.
- Hold at the End of the Handle: Hold the brush near the end of the handle rather than near the bristles. This provides better control over the brush’s movement and allows for more delicate, precise strokes.
- Use Your Fingers and Thumb: Hold the brush between your thumb and fingers, similar to holding a pencil. Your thumb and fingers should be near the brush’s ferrule (the metal part that holds the bristles) and handle.
- Adjust Pressure for Line Thickness: Adjust the pressure you apply to the brush to control the thickness of the line or stroke. Light pressure will create thinner lines, while slightly more pressure can result in thicker lines.
- Avoid Holding Like a Pen: While the grip might be similar to holding a pencil, avoid gripping the brush like a pen. Holding it too close to the bristles can lead to less control and more difficulty in achieving detailed work.
- Use Your Wrist and Arm: When making small, precise strokes, use your wrist to control the brush movement. For broader strokes and washes, engage your arm’s movement in addition to your wrist.
- Experiment and Find Your Comfort Zone: Experiment with different hand positions and grips to find what feels most comfortable and natural for you. Your grip might vary based on the brush size, the type of stroke you’re making, and your personal preferences.
- Practice Consistently: Consistent practice will help you develop muscle memory and better control over your brush. The more you paint, the more you’ll refine your grip and technique.
Remember that holding a watercolor brush is a personal matter of comfort and control. While there are general guidelines for holding the brush effectively, finding your own unique grip and style that allows you to create the effects you desire is crucial. With time and practice, you’ll develop a comfortable and efficient way of holding the brush that complements your artistic approach.
How do you prevent brush strokes in watercolor when using a watercolor brush?
Preventing visible brush strokes in watercolor painting requires a combination of techniques, brush handling, and paint application. While some brush strokes are inherent to the watercolor medium, you can minimize their visibility and create smoother, more seamless effects. Here are some tips to help you prevent brush strokes in watercolor:
- Use Quality Brushes: Invest in high-quality watercolor brushes that have well-shaped bristles. Brushes with a good point and springback will help you achieve smoother strokes.
- Wet-on-Wet Technique: One effective way to minimize brush strokes is to use the wet-on-wet technique. Wet the paper with clean water before applying the paint. Then, drop or brush in your pigments onto the wet surface. The colors will blend and flow together, reducing the visibility of individual brush strokes.
- Blend Colors: Blend colors while they’re still wet to create smooth transitions and gradients. Overlapping wet washes allows the colors to naturally flow into each other, minimizing the appearance of distinct brush strokes.
- Use Larger Brushes for Washes: For large washes, use a larger brush to cover more surface area with fewer strokes. This helps create a more even and consistent wash without visible brush lines.
- Work Quickly: Watercolor dries relatively fast, so working quickly can help blend colors seamlessly before they dry and form distinct brush strokes.
- Layering and Glazing: Build up layers of transparent color gradually. Light, transparent layers allow the underlying layers to show through, creating a smooth appearance.
- Practice Brush Control: Practice controlling the amount of paint and water on your brush. Avoid overloading the brush with paint, which can result in visible brush marks. Use a damp brush for soft and smooth strokes.
- Use Natural Hair Brushes: Natural hair brushes, such as sable or squirrel, tend to produce smoother strokes due to their water retention and softness. They can help minimize the appearance of brush marks.
- Avoid Scrubbing: Avoid scrubbing the paper with the brush, as this can cause texture and visible brush marks. Instead, use light, controlled strokes.
- Dry Brush Technique: For textures or dry brush effects, apply very little water to the brush and use it to scumble or lightly stroke the surface. This can add texture without creating pronounced brush strokes.
- Experiment and Learn: Watercolor is a versatile medium that involves experimentation and learning. Over time, you’ll develop a sense of how different techniques and brush handling affect the appearance of brush strokes.
Remember, some visible brush strokes are part of the charm of watercolor painting and can contribute to the unique texture and character of your work. Embrace the beauty of the medium while using these techniques to create smoother and more controlled effects when desired.
What are some mistakes people make when using a watercolor brush?
Using a watercolor brush effectively requires practice and understanding of the medium. However, there are common mistakes that artists, especially beginners, might make when using a watercolor brush. Being aware of these mistakes can help you avoid them and improve your watercolor painting techniques. Here are some mistakes to watch out for:
- Overloading the Brush: Using too much paint on the brush can lead to excessive pooling and difficulty controlling the flow of color. This can result in blotchy or uneven washes. Use a damp brush and load it with an appropriate amount of pigment for the desired effect.
- Not Testing Colors: Failing to test the color on scrap paper before applying it to your artwork can lead to unexpected color outcomes. Different paper and water conditions can affect how the color appears on the surface.
- Using the Wrong Brush Size: Using a brush that’s too small for large areas or too large for fine details can result in challenges controlling the strokes and achieving the desired effects. Choose the appropriate brush size for the specific task at hand.
- Ignoring Water Control: Water is a crucial element in watercolor painting. Ignoring water control can lead to excessive bleeding, unintended blooms, and difficulty creating controlled washes. Understanding the balance between wet and dry surfaces is essential.
- Rushing the Process: Watercolor requires patience and a deliberate approach. Rushing through layers or not allowing the paint to dry between layers can result in muddy colors or unintentional mixing.
- Not Planning Ahead: Failing to plan the painting process can lead to frustration and errors. Having a general idea of the composition, color scheme, and order of layers can help you create a more cohesive and harmonious artwork.
- Scrubbing the Paper: Scrubbing the paper with the brush aggressively can damage the paper’s surface and create unwanted textures. Instead, use controlled strokes and layering techniques for smoother effects.
- Neglecting Brush Care: Not cleaning and reshaping the brush after each painting session can lead to bristle damage and loss of shape. Proper brush care ensures the longevity and performance of your brushes.
- Using a Dry Brush: Watercolor works best with a damp brush. Using a dry brush can result in patchy application and difficulty blending colors.
- Fear of Making Mistakes: Watercolor is a forgiving medium that allows for experimentation and adaptation. Don’t be afraid to make mistakes, as they’re part of the learning process. Embrace mistakes as opportunities to learn and improve.
- Not Exploring Techniques: Limiting yourself to one technique or style can hinder your growth as an artist. Experiment with various techniques, brush strokes, and effects to expand your skill set.
- Neglecting Values and Contrast: Failing to establish a range of values (light to dark) and contrast in your painting can result in a flat and uninteresting composition. Pay attention to the interplay of light and shadow.
By recognizing and addressing these common mistakes, you can enhance your watercolor painting skills and create more successful and visually appealing artworks. Remember that practice, experimentation, and a willingness to learn are key to improving your technique with a watercolor brush.
editor's pick
news via inbox
Stay one step ahead with exclusive tips, guides, and offers delivered directly to your inbox.
Sign up for our newsletter and elevate your home improvement game today!