Mastering the Use of Drywall Joint Tape: A Comprehensive Guide
Drywall joint tape, a humble yet indispensable component in the realm of construction and home improvement, finds its way into numerous applications, ensuring smooth and robust surfaces. This versatile tape serves as a critical aid in addressing drywall imperfections and reinforcing structural integrity. Let’s delve into the various applications of drywall joint tape and understand how it enhances the durability and aesthetics of different projects. We will also provide a step-by-step guide on how to use joint tape effectively and efficiently.
If you need help finding drywall joint tape for any of the versatile applications listed below, see our product review article here.
Exploring the Various Applications of Drywall Joint Tape
Sealing Drywall Seams
Perhaps the most common application of drywall joint tape is sealing the seams between adjacent drywall sheets. Whether constructing new walls or renovating existing spaces, these seams are inevitable. Paper drywall tape or self-adhesive fiberglass mesh tape is applied over the seams, creating a seamless surface. When joint compound is layered over the tape, it fuses with the drywall, concealing the seams entirely, resulting in a smooth and uniform finish.
Repairing Drywall Cracks
Drywall is susceptible to cracking due to settling, temperature fluctuations, or structural movement. To address these imperfections, fiberglass mesh tape is an ideal choice. Its strength and flexibility allow it to cover cracks effectively. Once applied, the tape reinforces the damaged area, preventing further expansion of the cracks and ensuring a solid repair.
Patching Holes and Minor Damage
Small holes, dents, and minor damage on drywall surfaces are common occurrences. For quick and straightforward fixes, patch tapes come to the rescue. These pre-cut paper or fiberglass tapes are ready to apply, eliminating the need for cutting. Patch tapes adhere easily to the damaged areas, and when covered with joint compound, they provide a seamless repair.
Reinforcing Drywall Corners
Drywall corners are susceptible to damage from impacts or wear. Corner bead tapes, usually made from metal or vinyl, reinforce and protect these vulnerable areas. They come in various profiles, such as L-shaped or bullnose, and are secured to the corners with nails or adhesive. Joint compound is then applied to blend the corner bead tape with the surrounding drywall, producing strong and defined corners.
Creating Archways and Curved Walls
For projects that involve creating archways or curved walls, specialized corner bead tapes with flexible properties are used. These tapes allow smooth transitions along curved surfaces, maintaining structural integrity while achieving aesthetically pleasing designs.
Moisture-Prone Areas
In spaces prone to moisture, such as bathrooms or kitchens, fiberglass mesh tape is the preferred choice. Its resistance to mold and moisture makes it suitable for maintaining durability in these environments, ensuring long-lasting repairs that withstand humidity and water exposure.
Repairing Drywall Damage in High-Traffic Areas
High-traffic areas like hallways or commercial spaces are more susceptible to wear and tear. Fiberglass mesh tape, with its enhanced strength, offers reliable reinforcement in these regions, preventing premature wear and maintaining the integrity of the drywall.
Conclusion
Drywall joint tape is a versatile tool that caters to a wide range of applications, transforming ordinary drywall surfaces into seamless, robust, and visually appealing features. From sealing seams to repairing cracks and patching holes, this unassuming tape plays a pivotal role in ensuring the structural soundness and aesthetics of various projects. Its adaptability, combined with the convenience of application, makes it an essential companion for DIY enthusiasts, professional contractors, and anyone seeking to achieve flawlessly finished drywall surfaces.
Step-By-Step Guide on How to Use Drywall Joint Tape Effectively and Efficiently
Drywall joint tape is a crucial element in creating seamless and durable drywall surfaces. Whether you’re a DIY enthusiast or a professional, mastering the proper technique of applying joint tape is essential for successful drywall installations and repairs. Follow this step-by-step guide to effectively use drywall joint tape:
Materials Needed:
- Drywall joint tape (paper or fiberglass mesh)
- Joint compound (also known as mud or plaster)
- Joint knife (also known as a taping knife)
- Drywall mud pan or hawk
- Utility knife or scissors
- Sandpaper (optional)
- Primer and paint (for finishing)
Step 1: Prepare the Drywall Surface
Ensure the drywall surface is clean, smooth, and free of any debris or dust. If there are any major imperfections or protrusions, address them before applying the joint tape.
Step 2: Choose the Right Joint Tape
Select the appropriate type of joint tape for your project. Paper tape requires a separate application of joint compound, while self-adhesive fiberglass mesh tape sticks directly to the drywall surface.
Step 3: Measure and Cut the Joint Tape
Measure the length of the seam or crack that needs to be covered and cut the joint tape accordingly. Use a utility knife or scissors to make clean, straight cuts.
Step 4: Apply Joint Compound (For Paper Tape)
If using paper tape, apply a thin layer of joint compound over the seam or crack using a joint knife. The compound should be slightly wider than the width of the tape.
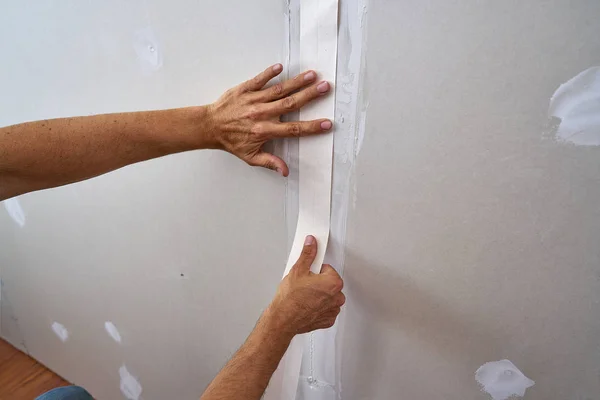
Step 5: Embed the Joint Tape
For paper tape: Press the cut strip of paper tape into the wet joint compound, centered over the seam or crack. Use the joint knife to smooth out any wrinkles or bubbles and ensure the tape is firmly embedded.
For self-adhesive fiberglass mesh tape: Simply press the tape firmly onto the drywall surface over the seam or crack. Use your fingers or the joint knife to ensure it adheres evenly.
Step 6: Apply Second Layer of Joint Compound
For paper tape: Once the tape is embedded, apply a second layer of joint compound over the tape, feathering the edges to blend it into the surrounding drywall.
For self-adhesive fiberglass mesh tape: Apply a thin layer of joint compound over the tape, making sure to cover it completely.
Step 7: Feather and Smooth the Joint Compound
Use the joint knife to feather and smooth the joint compound, blending it into the surrounding drywall. This step ensures a seamless transition and minimizes the appearance of the tape.
Step 8: Allow to Dry
Allow the joint compound to dry completely. Drying times may vary depending on the type and brand of compound used.
Step 9: Sand and Finish (Optional)
If desired, lightly sand the dried joint compound to achieve an even smoother finish. Wipe away any dust, prime the surface, and apply paint to match the surrounding drywall.
Step 10: Inspect and Touch Up
Inspect the finished joint for any imperfections or areas that may require touch-up. Make any necessary repairs or adjustments to achieve a flawless result.
Following these steps will help you effectively use drywall joint tape and achieve professional-quality drywall surfaces that are strong, seamless, and ready for finishing touches.
Frequently Asked Questions
Do you mud before mesh drywall joint tape?
When using mesh tape for drywall joints, it is common practice to apply a thin layer of joint compound (also known as mud) before applying the tape. This process is referred to as “mudding” or “pre-mudding.” Here’s how the sequence typically goes:
- Mudding (Pre-Mudding): Before applying the mesh tape, spread a thin layer of joint compound over the seam or crack using a joint knife. The layer of joint compound should be slightly wider than the width of the mesh tape. Pre-mudding helps create a smooth surface for the mesh tape to adhere to and provides a better bond.
- Applying the Mesh Tape: After pre-mudding, press the self-adhesive mesh tape firmly onto the joint compound, centered over the seam or crack. Ensure that the tape adheres evenly and smoothly to the drywall surface.
- Mudding Over the Mesh Tape: Once the mesh tape is in place, apply a second layer of joint compound over the tape, covering it completely. Use the joint knife to feather the edges of the compound to blend it into the surrounding drywall. This process helps embed the mesh tape and ensures a seamless transition.
- Finishing Coats: Depending on the project’s requirements and the desired finish, additional layers of joint compound (finish coats) may be applied over the dried initial coat. Each coat should be applied in a wider and thinner manner, feathering the edges to achieve a smooth and seamless surface.
It’s important to note that pre-mudding is specific to self-adhesive mesh tape since it requires an initial layer of joint compound for proper adhesion. On the other hand, if you are using paper drywall tape, pre-mudding is not necessary, as the paper tape is embedded directly into the joint compound during application.
By following these steps, you can effectively use mesh tape for drywall joints, ensuring a strong, seamless, and professionally finished drywall surface.
What are the disadvantages of mesh drywall joint tape?
While mesh tape offers several advantages, it also has some disadvantages that should be considered when deciding whether to use it for a specific drywall project. Here are the disadvantages of mesh tape:
- Higher Cost: Mesh tape is generally more expensive than traditional paper tape. If you are working on a large project or have a limited budget, the cost of using mesh tape may be a significant factor.
- Difficult to Cut: The mesh structure of fiberglass tape can be challenging to cut cleanly compared to paper tape. This can lead to uneven edges and may require more effort to achieve precise cuts.
- Less Forgiving: Mesh tape is less forgiving than paper tape when it comes to air bubbles or wrinkles during application. Once the adhesive side of the mesh tape touches the drywall, it’s not as easy to adjust or reposition without potentially damaging the tape.
- Mesh Visibility: Despite efforts to feather and smooth the joint compound, the mesh texture may still be somewhat visible under certain lighting conditions or paint finishes. This can be more noticeable than the flat appearance of paper tape when finished.
- Limited Embedding Time: Unlike paper tape, which can be embedded into wet joint compound over a more extended period, mesh tape needs to be applied more promptly due to its self-adhesive nature. This can make it challenging to work with for beginners or in large areas.
- Requires Adequate Compound Coverage: The adhesive nature of mesh tape requires thorough compound coverage to ensure proper adhesion. If the joint compound is not applied adequately, the tape may not adhere securely to the drywall, potentially leading to future cracks or issues.
- Not Suitable for Inside Corners: Mesh tape is not recommended for inside corners, as it lacks the flexibility required to smoothly wrap around corners. Traditional paper tape or corner bead tape is a better choice for reinforcing inside corners.
Despite these disadvantages, many professionals and DIY enthusiasts still choose to use mesh tape because of its strength, durability, and resistance to mold and moisture. Ultimately, the decision to use mesh tape or paper tape depends on your specific needs, level of experience, and budget for the project. For certain applications, a combination of both types of tape may be used to take advantage of their respective strengths.
Do professional drywallers use drywall joint tape?
Yes, professional drywallers commonly use tape in their drywall installation and repair projects. Drywall tape is a fundamental component in creating seamless and durable drywall surfaces, and it plays a crucial role in reinforcing joints, covering seams, and ensuring a smooth finish.
Professional drywallers typically use either paper tape or fiberglass mesh tape, depending on the specific project requirements and their personal preferences. Both types of tape have their advantages and are widely used in the industry.
Paper tape is a traditional choice that requires a separate application of joint compound, also known as mud, during installation. It is often used for taping flat seams, inside corners, and covering joints, providing a smooth and seamless finish when skillfully applied.
Fiberglass mesh tape, on the other hand, is a modern alternative that comes with a self-adhesive backing. This makes it easier and quicker to apply compared to paper tape, as it sticks directly to the drywall surface. It is commonly used for covering and reinforcing seams, cracks, and holes in drywall, offering enhanced strength and durability.
Professional drywallers have the experience and expertise to efficiently apply drywall tape, embed it into joint compound, and achieve a seamless finish. They are well-versed in various techniques for applying joint compound and ensuring that the tape adheres securely to the drywall surface.
Using tape is a standard practice for professional drywallers because it ensures the structural integrity and longevity of the drywall installation or repair. Properly applied tape prevents cracks and seam separation, creating a solid and aesthetically pleasing surface ready for finishing touches such as sanding, priming, and painting.
In summary, drywall tape is an essential tool for professional drywallers, and it is widely used in the industry to achieve high-quality drywall installations and repairs. Its versatility, strength, and ability to create seamless surfaces make it an indispensable component in the hands of skilled drywall professionals.
editor's pick
news via inbox
Stay one step ahead with exclusive tips, guides, and offers delivered directly to your inbox.
Sign up for our newsletter and elevate your home improvement game today!