Mastering the Use of a Thin Rip Jig: A Comprehensive Guide
Woodworking is an art that demands precision and creativity. To achieve stunning results, woodworkers often rely on a diverse range of tools to meet different cutting needs. Among these tools, the thin rip jig stands out as a versatile and indispensable accessory. While its primary purpose is to assist in cutting narrow strips, its applications extend far beyond this fundamental function. In this article, we will delve into the various applications of a thin rip jig, unlocking its potential to enhance woodworking projects in multiple ways. We will also provide a step-by-step guide on how to use a thin rip jig effectively and safely.
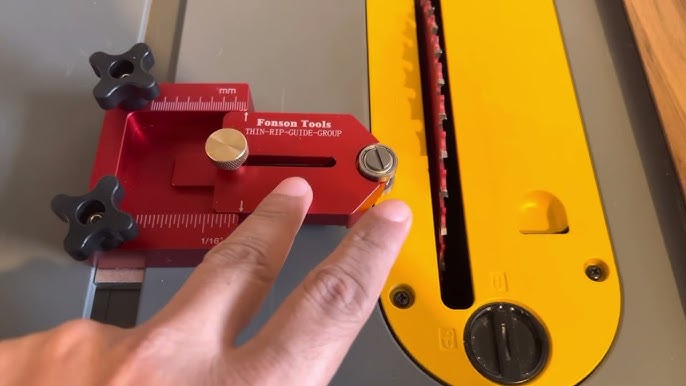
If you need help finding a thin rip jig for any of the versatile applications listed below, check out our product review here.
Unlocking the Versatility: Exploring the Many Applications of a Thin Rip Jig in Woodworking
Crafting Thin Moldings
One of the most common applications of a thin rip jig is crafting custom thin moldings. Whether for architectural details, furniture embellishments, or picture frames, this jig allows woodworkers to create intricate moldings with consistent dimensions and profiles. By guiding the workpiece along the jig, you can achieve precise cuts, resulting in beautifully crafted moldings that add elegance to your projects.
Veneers and Edging
Veneering and edging are techniques used to embellish and strengthen wood surfaces. A thin rip jig becomes an invaluable tool in these applications, allowing woodworkers to create thin strips for veneering larger surfaces or edging furniture and cabinets. With the jig’s precision, you can ensure that the veneers and edging fit seamlessly, elevating the overall aesthetics of your woodworking pieces.
Marquetry and Inlays
Marquetry and inlays involve the artful insertion of thin pieces of wood or other materials into the surface of a larger workpiece. This jig is ideal for cutting the delicate strips required for these artistic and decorative applications. By using the jig to create precise strips, woodworkers can achieve intricate and mesmerizing patterns that make their projects stand out.
Laminations and Resawing
In certain woodworking projects, laminations are used to create thicker components by gluing together thin strips of wood. A thin rip jig assists in cutting these strips to the desired thickness accurately. Additionally, for resawing thicker boards into thinner pieces, this jig ensures uniformity and precision throughout the process.
Scrap Reduction
Woodworkers are always mindful of minimizing waste and making the most out of available materials. A thin rip jig helps reduce scrap by allowing you to cut thin strips from larger pieces, effectively utilizing wood and minimizing wastage. This efficient use of materials can lead to cost savings and eco-friendly woodworking practices.
Repetitive Cuts
Many woodworking projects require multiple identical narrow strips. This handy tool shines in such scenarios, as it allows you to set the desired width and consistently produce repetitive cuts with ease and accuracy. This feature is particularly valuable for projects like window frames, cabinet doors, or any application requiring uniformity.
Cutting Splines
Splines are thin strips of wood used to strengthen and align joints in woodworking projects. A thin rip jig can be utilized to cut precise splines that fit snugly into dadoes or slots, reinforcing the joints and adding durability to the final assembly.
In conclusion, the thin rip jig is a powerhouse tool in the world of woodworking, elevating the precision and creativity of various projects. From crafting moldings to creating marquetry, veneers, and splines, its applications are diverse and essential for achieving professional results. As you explore the versatility of this specialized jig, you’ll find that it unlocks new possibilities and elevates your woodworking craftsmanship to new heights. Embrace the power of this remarkable tool, and let it inspire you to create woodworking masterpieces that leave a lasting impression.
Step-By-Step Guide on How to Use a Thin Rip Jig Effectively and Safely
Using a thin rip jig effectively and safely is essential to achieve accurate and precise narrow strip cuts in woodworking. Follow this step-by-step guide to get the best results while using this trusted tool:
Step 1: Gather the Necessary Tools and Safety Gear
Before you begin, gather all the tools you’ll need, including the thin rip jig, the table saw, the workpiece, and any required accessories. Additionally, wear appropriate safety gear, such as safety glasses, hearing protection, and appropriate clothing.
Step 2: Adjust the Jig to the Desired Width
Start by adjusting the jig to the desired width of the narrow strip you want to cut. Most thin rip jigs have an adjustable guide or fence that allows you to set the width precisely. Use a measuring tool or gauge to ensure accuracy.
Step 3: Attach the Jig to the Saw
Securely attach the jig to the fence or table of your table saw. The jig should be stable and firmly fastened to prevent any movement during cutting.
Step 4: Set the Cutting Height
Adjust the height of the table saw blade to the appropriate height for the thickness of the workpiece. Ensure that the blade height is only slightly higher than the thickness of the wood to minimize the risk of kickback.
Step 5: Position the Workpiece
Position the workpiece against the thin rip jig’s guide or fence, aligning it with the desired width for the narrow strip cut. The workpiece should be placed firmly and evenly against the jig, ensuring it stays straight during the cut.
Step 6: Make the Cut
Turn on the table saw and slowly feed the workpiece through the thin rip jig along the fence or guide. Use steady and even pressure to guide the workpiece through the cut. Avoid pushing the material too forcefully, as it can lead to inaccurate cuts or kickback.
Step 7: Maintain Safety Precautions
Keep your hands and fingers away from the path of the blade at all times. Avoid reaching over or behind the blade while it’s running. If necessary, use a push stick or push block to maintain a safe distance between your hands and the blade.
Step 8: Repeat for Additional Cuts
If you need to make multiple narrow strip cuts, repeat the process for each cut. Ensure that the thin rip jig is properly adjusted and the workpiece is securely positioned before making each cut.
Step 9: Turn Off the Saw and Inspect the Cuts
Once you have completed the cuts, turn off the table saw and inspect the strips for accuracy and uniformity. Make any adjustments to the thin rip jig or the table saw as needed to achieve the desired results.
Step 10: Store the Thin Rip Jig Safely
After use, store the jig in a designated and safe place in your workshop. Keep it away from other tools and materials to prevent damage and ensure easy access for future projects.
By following this step-by-step guide and prioritizing safety at all times, you can use a thin rip jig effectively and achieve precise and consistent narrow strip cuts in your woodworking projects.
Frequently Asked Questions
What are some things you should never do with a thin rip jig?
Using a thin rip jig can greatly enhance your woodworking projects, but it’s important to exercise caution and follow safety guidelines. Here are some things you should never do with a thin rip jig:
- Never Use an Improperly Sized Thin Rip Jig: Using a thin rip jig that does not fit securely in your table saw’s miter slot or fence can lead to instability and unsafe cutting conditions. Always ensure that the jig is compatible with your equipment before using it.
- Never Force the Workpiece through the Jig: Forcing the workpiece through the jig can cause binding, kickback, or result in inaccurate cuts. Allow the jig to guide the workpiece smoothly, applying steady and even pressure without excessive force.
- Never Reach Over or Behind the Blade: Avoid reaching over or behind the blade while it is running. Keep your hands and fingers away from the path of the blade at all times to prevent potential accidents.
- Never Remove the Blade Guard or Safety Features: The blade guard on your table saw is designed to protect you from coming into direct contact with the spinning blade. Never remove or disable the blade guard or any other safety features while usingthis tool.
- Never Use a Worn or Damaged Thin Rip Jig: Inspect the thin rip jig before each use to ensure it is in good working condition. If the jig shows signs of wear or damage, such as bent components or loose parts, refrain from using it and replace it with a new one.
- Never Make Cuts Without Proper Training: If you are unfamiliar with using a thin rip jig or operating a table saw, seek proper training before attempting to make cuts. Understanding the tool’s operation and safety procedures is crucial to prevent accidents and injuries.
- Never Use a Thin Rip Jig for Non-Applicable Cuts: This type of jig is specifically designed for narrow strip cuts. Avoid using it for other cutting tasks that it is not intended for, as it may compromise the jig’s functionality and lead to unsafe conditions.
- Never Stand Directly in Line with the Blade: Position yourself to the side of the blade while using the thin rip jig. Standing directly in line with the blade increases the risk of injury in case of kickback or other accidents.
- Never Rush Through Cuts: Take your time and maintain a steady pace when using a thin rip jig. Rushing through cuts can lead to mistakes or unsafe practices. Ensure your full attention is on the task at hand.
- Never Forget Safety Gear: Always wear appropriate safety gear, such as safety glasses and hearing protection, while using a thin rip jig and other power tools. Personal protective equipment is crucial to protect yourself from potential hazards.
By avoiding these practices and adhering to safety guidelines, you can use a thin rip jig effectively and safely, ensuring precise and consistent narrow strip cuts in your woodworking projects while minimizing the risk of accidents and injuries.
How do you make a thin rip jig?
Making a thin rip jig is a practical and cost-effective solution for woodworking enthusiasts. With some basic materials and tools, you can create a custom jig that fits your specific needs. Here’s a step-by-step guide to making a simple thin rip jig for your table saw:
Materials Needed:
- A piece of sturdy plywood or MDF (Medium-Density Fiberboard)
- A hardwood strip (e.g., maple, oak) or an aluminum T-track (optional)
- Screws or bolts with washers and nuts
- Ruler or measuring tape
- Pencil
- Table saw
- Drill and drill bits
- Screwdriver or wrench
Step 1: Measure and Cut the Base: Determine the desired length and width of your thin rip jig base. It should be large enough to provide stability and support for your workpiece. Use a ruler or measuring tape and mark the measurements on the plywood or MDF. Cut the base to size using a table saw.
Step 2: Create the Guide Rail: If you want to add a hardwood guide rail for your thin rip jig, cut a hardwood strip to the same length as the base. Alternatively, you can use an aluminum T-track for the guide rail, which provides a smooth surface for the workpiece to slide against.
Step 3: Attach the Guide Rail (Optional): Position the hardwood strip or T-track along the edge of the base and align it properly. Use screws or bolts with washers and nuts to securely attach the guide rail to the base. Make sure the rail is straight and flush with the edge of the base.
Step 4: Determine the Cutting Width: Decide the maximum width of the narrow strips you want to cut with the jig. Mark this measurement on the base, indicating the position of the guide rail relative to the blade path on your table saw.
Step 5: Secure the Thin Rip Jig to the Table Saw Fence: Position the thin rip jig against the table saw fence, aligning the guide rail with the blade path. Use clamps or other suitable fastening methods to secure the jig firmly to the fence.
Step 6: Test and Adjust the Jig: Before making any cuts, do a test run with scrap wood to ensure that the jig is set up correctly. Adjust the guide rail and the position of the jig if necessary to achieve the desired cutting width.
Step 7: Cut Your Narrow Strips: Once you are satisfied with the setup, you are ready to use the thin rip jig. Feed your workpiece through the jig, keeping it firmly against the guide rail. Move the workpiece slowly and steadily through the cut to ensure accuracy and safety.
Step 8: Store the Thin Rip Jig: After use, store the thin rip jig in a safe and designated location in your workshop. Keep it away from other tools and materials to prevent damage and ensure easy access for future projects.
Remember to prioritize safety when using your homemade thin rip jig. Always wear appropriate safety gear and follow safety guidelines while operating the table saw and using the jig. With a well-made thin rip jig, you can achieve precise and consistent narrow strip cuts in your woodworking projects.
What are some alternatives to using a thin rip jig when making thin cuts?
When making thin cuts in woodworking, there are several alternatives to using a thin rip jig. These alternatives may be more suitable depending on the type of cut you need and the tools available in your workshop. Here are some alternatives to consider:
- Table Saw Rip Fence: For making straight and narrow rip cuts on a table saw, you can use the table saw’s rip fence. Set the fence to the desired width of the cut, and carefully guide the workpiece through the blade. While the rip fence provides a straightforward solution for narrow cuts, it may not be ideal for repetitive cuts or irregular shapes.
- Bandsaw with Fence or Miter Gauge: A bandsaw equipped with a fence or a miter gauge can also be used for making thin cuts. Set the fence or miter gauge to the desired width and carefully feed the workpiece through the bandsaw blade. Bandsaws are great for cutting curves and irregular shapes, making them a versatile option for various thin cuts.
- Router Table with Straight Bit: If you need to make thin edge cuts, a router table with a straight bit can be a useful alternative. Set the fence on the router table to the desired width, and run the edge of the workpiece along the straight bit. This method is particularly effective for adding edging or decorative details to woodworking projects.
- Hand Saw and Guide Block: For small, occasional thin cuts, a hand saw with a guide block can be a viable option. Use a square or another straight guide to keep the saw aligned while cutting. Hand saws provide more control for delicate cuts and are suitable when power tools are not available or practical.
- Resawing with Bandsaw: If you need to create thin boards from thicker stock, you can use a bandsaw for resawing. This process involves cutting a board into thinner pieces. Adjust the bandsaw’s blade tension and fence to control the thickness of the cuts.
- Table Saw Crosscut Sled: For making thin crosscuts, a table saw crosscut sled with a stop block can be an alternative. Set the stop block to the desired width, position the workpiece against it, and then make the cut using the crosscut sled.
- Circular Saw with Guide Rail: A circular saw equipped with a guide rail can be a portable solution for making thin cuts. Secure the guide rail to the workpiece and then run the circular saw along the guide for accurate cuts.
Remember to exercise caution and use appropriate safety gear when using any of these alternatives. Always choose the method that best suits your project’s needs and your comfort level with the tools at hand.
editor's pick
news via inbox
Stay one step ahead with exclusive tips, guides, and offers delivered directly to your inbox.
Sign up for our newsletter and elevate your home improvement game today!