Mastering the Use of an Egg-Beater Drill: A Comprehensive Guide
In the world of hand tools, where power and precision intersect, the egg-beater drill holds a distinctive place. This manual wonder, often referred to as a hand drill, is a versatile tool with a long history, offering a wide range of applications that showcase its unique attributes. While electric drills have become a staple in many workshops, the egg-beater drill continues to shine in tasks that require finesse, control, and a connection to traditional craftsmanship. Let’s delve into the various applications where this tool truly excels. We will also provide a step-by-step guide on how to use an egg-beater drill effectively and efficiently.
If you need help finding an egg-beater drill for any of the versatile applications listed below, see our product review article here.
Exploring the Diverse Applications of an Egg-Beater Drill: A Testament to Precision and Craftsmanship
Woodworking Wonders
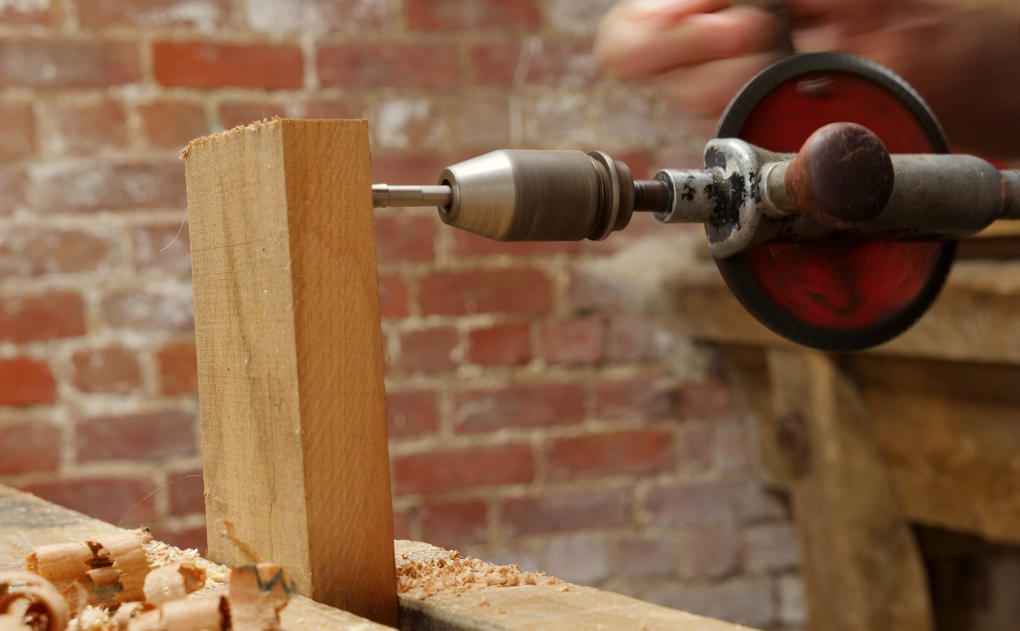
Woodworking is where the egg-beater drill truly comes into its own. Whether it’s crafting furniture, assembling cabinetry, or creating intricate wooden designs, the precision and control offered by a hand drill prove invaluable. From pilot holes for screws to creating dowel joints and intricate woodwork details, the manual operation of the egg-beater drill ensures that delicate materials are handled with care, minimizing splintering and damage.
Model Making and Miniatures
Model enthusiasts and miniature artists appreciate the gentle touch of an egg-beater drill. When creating precise holes in small-scale structures, such as model houses, ships, or airplanes, an egg-beater drill’s slow and controlled drilling helps maintain the integrity of delicate components, ensuring a flawless end product.
Jewelry Crafting and Beadwork
In the realm of jewelry making, where precision and artistry intersect, an egg-beater drill finds its place. Crafting holes in beads, pendants, and other jewelry components demands meticulous control, preventing fractures and ensuring the piece’s longevity. The ability to work at lower speeds and carefully apply pressure is essential for jewelry artists aiming for perfection in their creations.
Craft Projects and Hobbies
From creating holes in leather for crafting belts and accessories to fashioning openings in cardboard for custom packaging, an egg-beater drill serves as a reliable tool for various crafts. Its versatility extends to hobbies like model railroading, dollhouse construction, and more, where small-scale precision is key.
Antique Restoration
Restoring antiques often requires replicating period-accurate holes and details. The egg-beater drill’s manual operation aids in replicating traditional construction techniques, maintaining the authenticity and integrity of restored pieces.
Educational Tool
In educational settings, an egg-beater drill becomes an effective tool to introduce beginners to woodworking, hand tool usage, and basic drilling techniques. It offers a hands-on experience that builds foundational skills and fosters an appreciation for craftsmanship.
Remote Work and Outdoor Projects
In outdoor or remote environments, where access to electricity might be limited or nonexistent, an egg-beater drill proves its worth. Whether it’s building shelters, setting up camp, or tackling DIY projects in remote locations, the tool’s portability and manual operation make it a reliable companion.
Detailed DIY Repairs
For small-scale home repairs or modifications, an egg-beater drill can be a useful ally. From installing curtain rods to mounting hooks, this tool provides the precision needed for such tasks without the bulk and noise associated with electric drills.
In conclusion, the egg-beater drill is more than just a relic of the past; it’s a versatile tool that finds its place in a range of applications. Its manual operation offers benefits that power drills cannot replicate – a controlled, deliberate touch that’s ideal for delicate work and traditional craftsmanship. While it might not replace electric drills in all scenarios, its precision, historical significance, and ability to connect users to their projects make it an indispensable tool for artisans, hobbyists, and craftsmen who value the art of creating with their hands.
Step-By-Step Guide on How to Use an Egg-Beater Drill Effectively and Efficiently
Using an egg-beater drill, also known as a hand drill, effectively requires attention to detail, proper technique, and a steady hand. Whether you’re a woodworking enthusiast, a hobbyist, or a beginner, here’s a step-by-step guide to help you master the art of using an egg-beater drill:
Step 1: Prepare Your Work Area
Set up a clean, organized work area with ample space to maneuver the hand drill. Ensure your workpiece is secure and won’t move around during drilling.
Step 2: Select the Right Drill Bit
Choose the appropriate drill bit for your project. Consider the material you’re drilling into and the hole size you need. Make sure the drill bit is securely seated in the drill’s chuck.
Step 3: Adjust the Chuck
Open the chuck by turning the knurled part at the front of the drill counterclockwise. Insert the drill bit into the chuck and tighten it by turning the knurled part clockwise. Make sure the bit is held securely in place.
Step 4: Position the Drill
Hold the egg-beater drill with one hand on the handle and the other on the knob at the end of the drill. Position the drill bit at the desired starting point on the workpiece. Align the bit perpendicular to the surface to ensure a straight hole.
Step 5: Apply Pressure
With the drill bit touching the workpiece, apply light and steady pressure to the handle while turning the knob at the end of the drill with your other hand. Start with slow and controlled turns to create a small groove or “center punch” to guide the drill bit.
Step 6: Begin Drilling
Once the center punch is created, continue turning the knob and applying pressure to start drilling. Maintain a consistent speed and pressure to prevent the bit from wandering or causing splintering. Keep the drill as straight as possible to ensure a clean hole.
Step 7: Clear Shavings
Periodically lift the drill bit slightly to allow the shavings to escape the hole. This prevents the bit from getting clogged and ensures smoother drilling. You can also blow away the shavings or use a brush to clear them.
Step 8: Control Depth
To control the depth of the hole, mark a point on the drill bit as a reference. As you drill, periodically check the mark against the surface to gauge the depth. Alternatively, use a piece of tape wrapped around the bit as a depth guide.
Step 9: Finish Drilling
Continue turning the knob and applying pressure until you’ve drilled through the material. Once the hole is complete, release pressure on the handle and knob.
Step 10: Remove the Drill Bit
Loosen the chuck by turning the knurled part counterclockwise. Remove the drill bit and set it aside.
Step 11: Clean Up
Clear away any remaining shavings and debris from your work area. Check the hand drill for any shavings that might have accumulated near the chuck.
Step 12: Maintenance
After use, wipe down the egg-beater drill to remove any dirt or debris. Store it in a dry place, away from moisture, to prevent rusting.
By following these steps and practicing, you’ll become adept at using an egg-beater drill effectively. Remember, the key lies in maintaining a steady pace, applying consistent pressure, and ensuring proper alignment for accurate and clean holes in your projects.
Frequently Asked Questions
What are some things I should never attempt with an egg-beater drill?
While egg-beater drills are versatile tools with many applications, there are certain tasks that you should avoid attempting with them due to their limitations and potential safety concerns. Here are some things you should never attempt with an egg-beater drill:
- Heavy-Duty Metal Drilling: Egg-beater drills are not designed for heavy-duty metal drilling. Attempting to drill through thick or hard metals, such as steel or iron, can strain the drill’s gears and handle, potentially causing damage to the tool and posing a safety risk.
- Large Holes in Dense Materials: Creating large-diameter holes in dense materials like hardwood or masonry is not advisable. The limited torque and speed of an egg-beater drill make it inefficient and impractical for such tasks.
- Rapid Drilling: Egg-beater drills operate at slower speeds compared to electric drills. Trying to drill quickly or forcefully can result in reduced accuracy and control, increasing the likelihood of the drill bit slipping, causing damage to the material or the bit itself.
- Concrete or Masonry Drilling: Egg-beater drills are not suitable for drilling into concrete, brick, or other masonry materials. These materials are too dense and abrasive for the tool, which can lead to overheating and rapid wear of the drill bit.
- Long, Deep Holes: Creating long or deep holes using an egg-beater drill can be time-consuming and physically demanding. The manual effort required for extended periods can lead to fatigue and may not result in the desired outcome.
- High-Speed Drilling: Egg-beater drills are not designed for high-speed drilling. Attempting to increase the drilling speed beyond the tool’s capabilities can cause the gears to wear out quickly and compromise the tool’s accuracy.
- Drilling Without Proper Alignment: Egg-beater drills require careful alignment to ensure accurate drilling. Attempting to drill without proper alignment can result in skewed or crooked holes, affecting the quality of your work.
- Repeated Heavy-Duty Tasks: If you have a large number of holes to drill, especially in tough materials, an egg-beater drill might not be the most efficient choice. Repetitive heavy-duty tasks can strain both the user and the tool.
- Ignoring Safety Precautions: Like any tool, safety should be a top priority. Avoid using the drill without appropriate eye protection, and always keep your hands and other body parts clear of the moving parts.
- Ignoring Manufacturer’s Recommendations: Every egg-beater drill comes with its own set of specifications and limitations outlined by the manufacturer. Ignoring these recommendations can lead to reduced tool life, poor results, or safety hazards.
In summary, while egg-beater drills are versatile and reliable tools, they have limitations that should be acknowledged. Avoid attempting tasks that go beyond the tool’s capabilities to ensure your safety, the tool’s longevity, and the quality of your work. For heavy-duty tasks, large holes, or drilling into challenging materials, consider using more appropriate tools such as electric drills or specialized equipment.
When was the egg-beater drill invented?
The egg-beater drill, also known as the hand drill, has a history that dates back centuries. While the exact date of its invention is not precisely documented, the basic concept of a manually operated drilling tool has been around for a long time.
Early versions of hand drills were used in ancient civilizations, including ancient Egypt and Greece, where bow drills and similar hand-cranked devices were used to bore holes in materials. These primitive tools laid the foundation for the development of more sophisticated hand drills.
The design of the egg-beater drill as we know it today began to take shape in the 19th century. The transition from the earlier bow drills to the more efficient hand-cranked design allowed for smoother operation and greater precision. The term “egg-beater drill” originated from the tool’s resemblance to the hand-cranked egg beaters used in kitchens.
In the mid-19th century, patents for improved hand drills with various gearing mechanisms and chuck designs began to emerge. These patents helped refine the design and functionality of the egg-beater drill, making it more versatile and practical for a range of applications.
By the late 19th and early 20th centuries, egg-beater drills had become commonly used tools in workshops, households, and industries. The introduction of ball bearings, improved gear ratios, and enhanced chucks further enhanced their performance and popularity.
While there is no specific inventor credited with the creation of the egg-beater drill, its development was a result of incremental improvements and adaptations over time. The tool’s evolution was driven by the need for more efficient and precise drilling methods in various industries and crafts.
Today, the egg-beater drill remains a valuable tool for those who appreciate its manual operation, precision, and historical significance in the world of hand tools.
Is a modern egg-beater drill made from modern materials?
Yes, modern egg-beater drills are often made using a combination of traditional and modern materials. While the basic design and function of egg-beater drills have remained relatively consistent over time, advancements in materials and manufacturing techniques have led to improvements in durability, performance, and user experience.
Here are some common materials used in modern egg-beater drills:
Metal Components:
- Steel: Many parts of egg-beater drills, such as gears, shafts, and chucks, are often made from high-quality steel. Steel provides strength and durability, ensuring that the tool can withstand the forces exerted during drilling.
- Aluminum: Some components, like the handle and parts of the body, might be made from lightweight aluminum to reduce overall tool weight.
Bearings and Bushings:
- Ball Bearings: Modern egg-beater drills often incorporate ball bearings into their gear mechanisms. Ball bearings reduce friction, resulting in smoother operation and improved efficiency.
- Bronze or Brass Bushings: These materials might be used in the construction of the crank and other moving parts to reduce wear and friction.
Plastic Components:
- Handles and Grips: Plastic materials are commonly used for handles and grips. They provide comfort during operation and are designed with ergonomic considerations in mind.
- Chuck Parts: Some parts of the chuck might be made from durable plastics to reduce weight and friction while maintaining functionality.
Rubber Components:
- Anti-Slip Grips: Rubberized coatings or grips are often applied to handles and knobs to prevent slipping during operation, enhancing user safety and control.
Composite Materials:
- Modern egg-beater drills might incorporate composite materials that combine the strengths of different materials, such as plastics and fibers, to create lightweight yet sturdy components.
Coatings and Finishes:
- Protective coatings, such as powder coatings or corrosion-resistant finishes, might be applied to metal parts to extend the tool’s lifespan and prevent rust.
While modern materials enhance the performance and durability of egg-beater drills, manufacturers often aim to preserve the tool’s traditional appearance and design. This balance between traditional craftsmanship and modern engineering ensures that the modern egg-beater drill retains its historical charm while meeting the demands of contemporary users.
editor's pick
news via inbox
Stay one step ahead with exclusive tips, guides, and offers delivered directly to your inbox.
Sign up for our newsletter and elevate your home improvement game today!