Finding the Best Detail Sander: Reviews and Guide
When it comes to achieving smooth and precise finishes in your woodworking or DIY projects, detail sanders are indispensable tools. These compact power tools are designed to reach tight corners and intricate spaces that larger sanders cannot effectively access. In this article, we will explore five popular detail sanders available on Amazon, delving into their features, applications, and the pros and cons of each.
Our Top Picks for Best Detail Sander
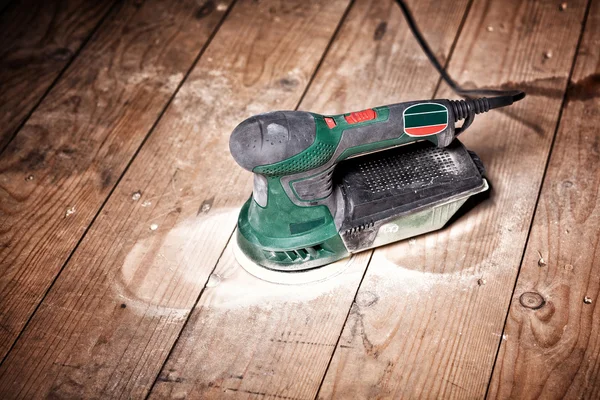
Black+Decker Mouse Detail Sander

![]()
The Black+Decker Mouse Detail Sander is a versatile and user-friendly tool suitable for various applications. Its compact size and pointed tip make it perfect for sanding small areas and tight corners. The triangular shape allows for precise maneuvering. This sander comes with interchangeable sanding pads and an integrated dust collection system, keeping your work area clean. However, some users have reported that the dust collector can be less efficient over time.
Pros:
- Versatile and user-friendly.
- Compact size and pointed tip for reaching tight corners.
- Interchangeable sanding pads for different applications.
- Integrated dust collection system for a cleaner work area.
Cons:
- Some users report reduced efficiency of the dust collector over time.
WORKPRO Detail Sander

![]()
The WORKPRO Detail Sander is renowned for its power and performance. With a 13,000 orbits per minute (OPM) speed, it swiftly and efficiently smooths surfaces. This sander features an ergonomic design with rubberized grips, reducing fatigue during extended use. Its large clamping lever ensures quick and easy paper installation. One drawback of this model is the absence of a dust collection system, leading to potentially messier workspaces.
Pros:
- Powerful performance with 13,000 OPM speed.
- Ergonomic design with rubberized grips for comfort.
- Large clamping lever for easy paper installation.
Cons:
- Lacks a dust collection system, leading to potentially messier workspaces.
DWT Detail Sander

![]()
The DWT Detail Sander is designed to provide a smooth sanding experience. Its 1.5-amp motor delivers an impressive 15,000 OPM, allowing for efficient material removal. This model features a rubber over-molded grip, ensuring comfort and control. The self-adhesive hook and loop system allows for easy sandpaper change. However, the dust collection system could be more effective, as some users have reported occasional dust leakage.
Pros:
- Efficient sanding with a 15,000 OPM motor.
- Rubber over-molded grip for comfort and control.
- Easy-to-use self-adhesive hook and loop system for sandpaper changes.
Cons:
- Some users report occasional dust leakage from the dust collection system.
SKIL Corded Multi-Function Detail Sander

![]()
The SKIL Corded Multi-Function Detail Sander is a reliable option with a durable build. Its 1.2-amp motor delivers 13,500 OPM, providing consistent power. This sander comes with a precision-machined aluminum sanding plate, ensuring smooth and even results. The ergonomic soft-grip design decreases vibration which allows for more comfort during prolonged use. The microfilter dust canister efficiently captures dust particles, reducing mess. However, the absence of variable speed control may limit its versatility in certain applications.
Pros:
- Durable build for long-lasting use.
- Precision-machined aluminum sanding plate for smooth results.
- Ergonomic soft-grip design for comfortable operation.
- Effective microfilter dust canister for reduced mess.
Cons:
- Does not have variable speed control, limiting versatility in certain applications.
WEN 6301 Electric Detailing Palm Sander

![]()
The WEN 6301 Detail Sander is a budget-friendly option without compromising on performance. With a 1.0-amp motor and 13,500 OPM, it can handle most light to medium sanding tasks. This sander features a velcro fastening system, allowing for quick and easy sandpaper changes. The compact size and triangular shape enable precise sanding in tight spaces. However, there is no dust collection bag.
Pros:
- Budget-friendly option without compromising on performance.
- Compact size and triangular shape for precise sanding.
- Velcro fastening system for quick sandpaper changes.
Cons:
- No dust collection bag
Conclusion
When it comes to achieving fine finishes in intricate spaces, detail sanders are invaluable tools. The Black+Decker Mouse Detail Sander, WORKPRO Detail Sander, DWT Detail Sander, SKIL Corded Multi-Function Detail Sander, and WEN 6301 Detail Sander are all excellent options available on Amazon. Each model comes with its own set of features, applications, and pros and cons. Consider your specific needs and preferences to select the detail sander that best suits your projects, ensuring smoother, more refined results in your woodworking or DIY endeavors.
What Should I Look for in a Good Detail Sander?
When searching for a good detail sander, there are several key factors to consider. These factors will help you ensure that the sander meets your specific requirements and delivers optimal performance. Here’s what to look for in a good detail sander:
- Power and Performance: Check the sander’s motor power and oscillations per minute (OPM) rating. Higher OPM generally indicates faster and more efficient material removal. Look for a detail sander with sufficient power to tackle your intended tasks effectively.
- Ergonomics and Comfort: Consider the sander’s design and ergonomics. Look for features such as rubberized grips, ergonomic handles, and balanced weight distribution. These aspects enhance comfort and reduce fatigue during prolonged use.
- Sanding Pad Options: Ensure that the detail sander offers versatility in terms of sanding pad options. Look for models that come with interchangeable pads or compatibility with a variety of sanding sheets. This allows you to adapt to different materials and achieve the desired finish.
- Dust Collection System: An efficient dust collection system is crucial for maintaining a clean and healthy work environment. Look for a detail sander with a built-in dust collection system or compatibility with a dust extraction attachment. Effective dust collection minimizes airborne particles and reduces the need for post-sanding cleanup.
- Sanding Sheet Fastening Mechanism: Check the type of fastening mechanism used to secure sanding sheets. Hook-and-loop (Velcro) or clamping systems are commonly used. Ensure that the mechanism is secure, reliable, and allows for quick and easy sandpaper changes.
- Versatility and Adjustability: Consider the versatility and adjustability of the sander. Look for features like variable speed control, which enables you to match the speed to different materials and tasks. This flexibility ensures more precise results and widens the range of applications for the sander.
- Build Quality and Durability: Check the build quality of the detail sander. Look for models with sturdy construction and durable materials that can withstand regular use. A reliable and robust sander will have a longer lifespan and provide consistent performance.
- Brand Reputation and Customer Reviews: Research the reputation of the brand and read customer reviews. Established brands with positive feedback generally offer higher quality and reliable products. Customer reviews provide valuable insights into real-world experiences, helping you make an informed decision.
By considering these factors, you can find a detail sander that suits your specific needs, provides excellent performance, and delivers high-quality results in your woodworking or DIY projects.
A Step-by-Step Guide to Using a Detail Sander for Woodworking
Introduction: Detail sanders are essential tools for achieving smooth finishes and intricate detailing in woodworking projects. Their compact size and maneuverability make them ideal for reaching tight corners and small areas. In this step-by-step guide, we will walk you through the process of using a detail sander effectively in your woodworking endeavors.
Step 1: Prepare Your Workspace
Before starting, ensure you have a well-organized and clutter-free workspace. Remove any obstacles or debris that may hinder your movement or interfere with the sanding process. Consider wearing safety goggles, a dust mask, and hearing protection for added safety.
Step 2: Choose the Right Sandpaper Grit
Select the appropriate sandpaper grit based on the task at hand. Coarser grits, such as 80 or 120, are ideal for removing rough surfaces or heavy paint layers, while finer grits, like 220 or 320, are suitable for smoothing and finishing. Attach the sandpaper to the detail sander according to the manufacturer’s instructions.
Step 3: Familiarize Yourself with the Detail Sander
Take a moment to become familiar with the features and controls of your detail sander. Locate the power switch and any speed control options, if applicable. Ensure you understand how to attach and remove sandpaper securely.
Step 4: Start with Light Pressure and Test on Scrap Wood
Before working on your project piece, it’s wise to practice on a scrap piece of wood. Apply light pressure to the sander and turn it on. Move the sander in smooth, controlled motions over the surface of the scrap wood, observing how the sander performs and how the wood responds. This helps you gauge the pressure and speed required for optimal results.
Step 5: Begin Sanding Your Woodworking Project
Once you feel confident with the sander, begin sanding your project piece. Start with the areas that require the most attention, such as rough edges, corners, or intricate details. Hold the detail sander firmly but without excessive force. Let the sander do the work as you guide it across the wood surface.
Step 6: Work in Small Sections
To achieve even results, work in small sections at a time. Move the sander in back-and-forth or circular motions, maintaining a steady and consistent pace. Avoid lingering in one spot for too long, as this may cause uneven sanding or damage to the wood.
Step 7: Pay Attention to Grain Direction
If you’re sanding natural wood, pay attention to the grain direction. Sand along the grain whenever possible to avoid leaving scratches or creating uneven surfaces. However, for certain applications, sanding against the grain may be necessary, such as when removing old paint or finish.
Step 8: Clean the Work Area Periodically
Regularly clean the work area to prevent dust buildup and maintain visibility. Use a brush or a vacuum with a dust collection attachment to remove the accumulated dust and debris. This helps to ensure a cleaner workspace and prevents dust particles from affecting the sanding process.
Step 9: Inspect Your Progress and Make Adjustments
Periodically inspect your work to evaluate the sanding progress. Feel the surface with your hand to detect any rough spots or imperfections that require additional attention. If necessary, switch to a finer grit sandpaper for a smoother finish or address any uneven areas.
Step 10: Final Touches and Finishing
Once you are satisfied with the overall sanding, switch to a finer grit sandpaper for the final touches. Sand lightly and evenly over the entire surface to achieve a consistent finish. Wipe away any dust and debris, and proceed with applying the desired finish, such as paint, stain, or varnish, following the manufacturer’s instructions.
Conclusion: Using a detail sander for woodworking projects allows you to achieve precise and smooth finishes in hard-to-reach areas. By following this step-by-step guide, you can effectively utilize a detail sander, ensuring optimal results in your woodworking endeavors. Remember to prioritize safety, choose the right sandpaper grit, and practice proper technique to enhance your woodworking skills and create impeccable pieces.
Unveiling the Versatile Applications of Detail Sanders: From Woodworking to DIY Projects
- Woodworking: Detail sanders are an indispensable tool in woodworking, where intricate details and refined finishes are paramount. They excel at smoothing out rough edges, rounding corners, and refining intricate designs in wooden pieces. Whether you’re crafting furniture, cabinets, or intricate wooden sculptures, detail sanders can help you achieve a polished and professional look.
- Refinishing and Restoring: Detail sanders are invaluable when it comes to refinishing and restoring old furniture or other wooden objects. They can effectively remove layers of old paint, varnish, or stain, revealing the natural beauty of the wood beneath. With their ability to access tight corners and intricate carvings, detail sanders make the process more efficient and help bring new life to worn-out pieces.
- DIY Home Improvement: Detail sanders find extensive use in various DIY home improvement projects. They are ideal for tasks such as sanding window frames, door frames, baseboards, and moldings. Detail sanders enable you to reach areas that larger sanders cannot, allowing for consistent and even sanding in tight spaces. Whether you’re preparing surfaces for painting, refinishing, or simply removing imperfections, detail sanders are a reliable choice.
- Automotive Projects: Detail sanders can also be utilized in automotive projects, particularly for sanding and smoothing body filler, repairing dents, or preparing surfaces for painting. Their compact size and maneuverability make them useful for accessing hard-to-reach areas in a vehicle, such as around door handles, fenders, or interior trim pieces.
- Arts and Crafts: Detail sanders are a valuable tool for artists and crafters working with various materials. They can be used to shape and refine sculptures made from materials like clay, foam, or wood. Detail sanders can also help smooth rough edges and imperfections in DIY craft projects, such as wooden boxes, picture frames, or handmade toys.
- Metalworking: While detail sanders are primarily associated with woodworking, they can also be used in certain metalworking applications. They are suitable for smoothing and deburring metal surfaces, removing rust or paint from metal objects, or preparing surfaces for welding or painting.
Frequently Asked Questions
What is difference between an orbital sander and a detail sander?
Orbital sanders and detail sanders are two distinct types of sanders, each designed for specific purposes. Here are the key differences between the two:
- Sanding Motion: The primary difference lies in their sanding motions. Orbital sanders have a circular or random orbital motion, meaning the sanding pad moves in a circular pattern while simultaneously vibrating or oscillating. This motion helps to minimize visible sanding marks and prevents the sander from following a consistent pattern. On the other hand, detail sanders typically have a reciprocating or back-and-forth motion, moving in a straight line or small arcs.
- Sanding Area: Orbital sanders are larger and cover a broader sanding area. They are generally used for sanding large, flat surfaces such as tabletops, floors, or walls. In contrast, detail sanders have a smaller sanding area, usually with a pointed or triangular shape, making them ideal for sanding tight corners, edges, and intricate details.
- Versatility: Orbital sanders offer more versatility in terms of the grits and sanding discs available. They can be used with various sandpaper grits, allowing for both rough material removal and fine finishing. Detail sanders, while limited in their sanding area, are highly versatile for reaching intricate spaces and achieving precision in detailed work.
- Application: Due to their sanding motion and larger sanding area, orbital sanders are commonly used for projects such as refinishing furniture, sanding floors, or preparing surfaces for painting or staining. They excel at removing rough surfaces, smoothing larger areas, and achieving consistent finishes. Detail sanders, with their smaller size and ability to access tight spots, are well-suited for woodworking tasks that require precision, such as sanding corners, edges, moldings, or carvings.
- Ergonomics: Both orbital sanders and detail sanders come in various ergonomic designs, but detail sanders often have a more compact and lightweight form factor. This design allows for better control and maneuverability in intricate areas. Orbital sanders, due to their larger size and circular motion, may require more physical effort to handle and control.
Understanding the differences between orbital sanders and detail sanders helps you choose the right tool for your specific project. Consider the size of the sanding area, the level of precision required, and the type of surface you will be working on to determine whether an orbital sander or a detail sander is the better choice for your sanding needs. To read more about orbit sanders, please read our article here.
Do I need a detail sander?
Whether or not you need a detail sander depends on your specific woodworking or DIY projects and the level of precision required. Here are some factors to consider when deciding if a detail sander is necessary for you:
- Project Requirements: Evaluate the nature of your projects. If you frequently work on projects that involve sanding intricate details, tight corners, or small areas that are challenging to access, a detail sander can be highly beneficial. It allows you to achieve precise and smooth finishes in these hard-to-reach spots.
- Precision and Finishing: If you prioritize achieving a high level of precision and a polished finish in your woodworking or DIY projects, a detail sander can be a valuable tool. It enables you to refine edges, smooth curves, and work on delicate or intricate designs with greater control and accuracy.
- Types of Materials: Consider the types of materials you commonly work with. If you frequently work with wood or other materials that require meticulous detailing, such as furniture, cabinets, or craft projects, a detail sander can assist you in achieving professional-looking results.
- Frequency of Use: Think about how often you would use a detail sander. If you anticipate using it frequently for various projects, investing in a detail sander can be worthwhile. However, if you only require occasional detail sanding, you might consider renting a detail sander or opting for alternative techniques like hand sanding for specific tasks.
- Existing Tools: Assess your current tool collection. If you already have other sanders, such as an orbital sander or a multi-tool with sanding attachments, they may be suitable for some detail work. However, keep in mind that detail sanders are specifically designed for intricate sanding tasks and offer superior maneuverability and precision in those areas.
- Budget: Consider your budget. Detail sanders are generally more affordable than larger sanders, but it’s still essential to evaluate your budget and determine if purchasing a detail sander fits within your financial constraints.
Ultimately, the need for a detail sander depends on your specific requirements, the level of precision you desire, and the frequency of detailed sanding tasks in your projects. Assess these factors to make an informed decision about whether a detail sander is a necessary addition to your toolkit.
What type of sander will give you the best finish?
The type of sander that will give you the best finish depends on the specific project and the surface you are working on. Different sanders excel in different applications. Here are some common sanders and the finishes they are best suited for:
- Random Orbital Sander: A random orbital sander is a versatile option that can provide a smooth finish on a variety of surfaces. It combines both orbital and rotational motions to minimize visible sanding marks, resulting in a more even finish. Random orbital sanders are commonly used for larger flat surfaces, such as tabletops, floors, or walls, where a consistent and fine finish is desired.
- Finishing Sander: As the name suggests, finishing sanders are specifically designed for achieving smooth and flawless finishes. They typically have a square or rectangular sanding pad and move in a back-and-forth or orbital motion. Finishing sanders are ideal for preparing surfaces before applying paint or varnish, as they can remove fine imperfections and create a silky-smooth surface.
- Detail Sander: For intricate detailing and accessing tight corners, a detail sander is the tool of choice. With its smaller size and specialized triangular or pointed sanding pad, it allows for precise sanding in hard-to-reach areas. Detail sanders are great for achieving a polished finish on edges, moldings, carvings, or other intricate features.
- Belt Sander: Belt sanders are known for their aggressive material removal capabilities and are commonly used for rough sanding or leveling large surfaces. While they may not provide the finest finish initially, they can be followed up with a finer-grit sandpaper or another sander to achieve the desired smoothness.
- Hand Sanding: In some cases, hand sanding can be the best option for achieving an exceptional finish. By using high-quality sandpaper and applying even pressure, you have complete control over the sanding process. Hand sanding allows you to finesse surfaces, blend edges, and achieve a customized finish based on the project requirements.
Ultimately, the best sander for achieving a superior finish depends on factors such as the size and shape of the surface, the level of precision required, and the condition of the material you are working with. It is often a combination of different sanding techniques, starting with more aggressive sanders and gradually progressing to finer-grit sandpapers or sanders for a smoother result.
editor's pick
news via inbox
Stay one step ahead with exclusive tips, guides, and offers delivered directly to your inbox.
Sign up for our newsletter and elevate your home improvement game today!